Configure Public Access Options on a Case Template
The Public Access panel allows Permit administrators to control what screens or tabs are visible to citizens when they log in to the public web site. Administrators may display or hide specific screen flow sections on a template-by-template basis.
|
|
 PREREQUISITES:
- From the home page, click Permitting and click Case Types.
- On the Case Templates panel, select a template.
- Select an entity type from the Public Access Entity Type drop-down list. When Public Access users begin an application based on this template, the entity type selected here is automatically selected when they use the map. If you leave this field undefined, the map will load the address where the user clicks.
- Use the Require Payment on Intake switch to turn the payment requirement on or off. Using this option requires payment in full to be posted before a case is submitted.
- Select the control panels you want associated with the template by adding options in the Controls field.
 NOTE: The Case Object control is selected by default. It can be removed, but should not be because it is required to create a case.
- Select which reports will be accessible to download from the public site in the Reports drop-down list.
- Select Child Cases to choose case templates that may be created as child cases.
- Select which users you want to be notified when comments are attached to a case by making selections in the Comment Notify Users drop-down list.
- Select which roles you want to be required on the case template by making selections in the Required People Roles drop-down list.

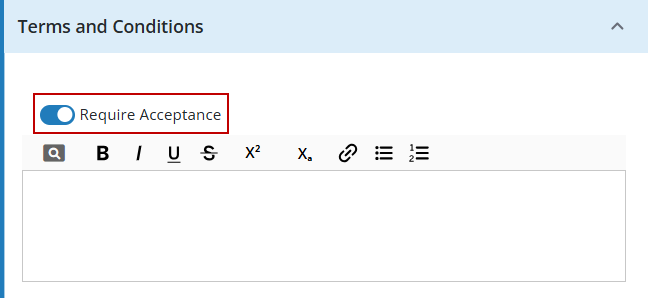
- Turn on the Require Acceptance switch in the Terms and Conditions section to require users to view and accept terms before creating a new case.
- Enter the terms and conditions required for this template in the Terms and Conditions text field.
Terms and conditions are a useful way to inform users if fees must be paid all at once or if they may be paid incrementally.
NOTE: If the Public Access user declines to accept the terms and conditions, it closes the panel and the user remains on the final step of the application process. The system will not create the case, but will keep the case in the list of incomplete applications so that the user can return and finish the application. If the Public Access user clicks Pay Now, the terms and conditions message will display and acceptance is prompted. The case is not created until the terms and conditions are accepted. The terms and conditions text field can also be used to provide customized instructions or warnings.
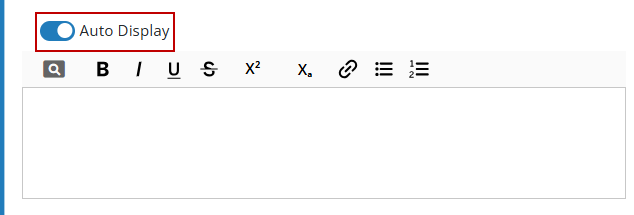
- Turn on the Auto Display switch in the Help and Info section to display a message when the user selects this case template.
- Enter text in the Help and Info text field to create the message you want users to see.
The message will display as soon as the user selects a case template, even if the Public Access site is using template categories.
NOTE: Admin automatically saves the changes you make. A notification pops up at the bottom to verify your changes have been saved.

