Add or Edit a Field Condition
Conditions can be created for fields that must be met before a work activity can be canceled, closed, or updated. For example, a condition can be created to ensure that an asset is attached to a work order before it is closed. If the condition is not met, administrators can configure a message to display that lets the user know what information needs to be populated. On service requests and work orders, universal custom fields can be used to create conditions.
- Select a Template that has an existing Field Validation Event.
 TIP: You can filter the list of records displayed. See Filter Records for more information.
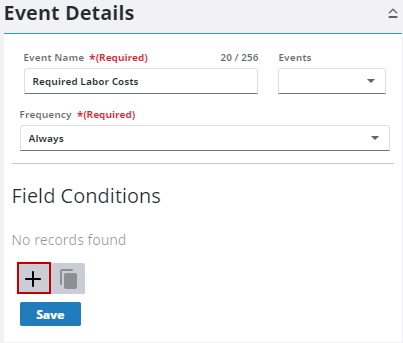
- Select the event you'd like to add a condition to.
- Click Add record under the Field Conditions section.
- Select the Validation Field that you'd either like to mark as Required or Read Only.
- Select Required or Read Only.
- Enter the Validation Message to User that displays when the condition is not met.
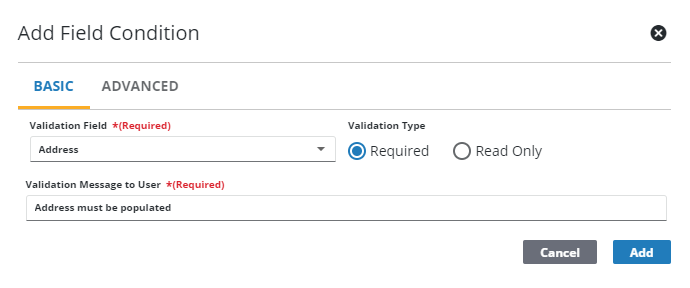
- Click Add.
The condition appears under the Fields Conditions section.
- To edit a field condition, expand the details and make any desired changes.
- Click Save.
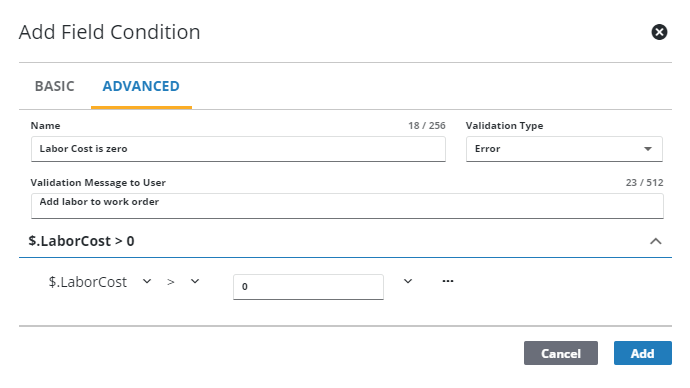
- Enter the Name of the condition.
- Select the Validation Type: Information, Warning, or Error.
- Enter the Validation Message to User that displays when the condition is not met.
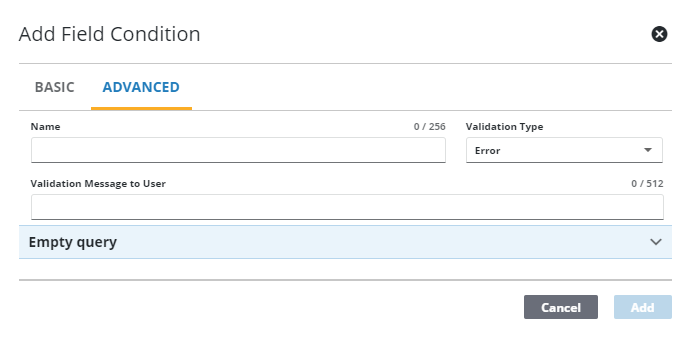
- Click Empty query and click Add Condition.
- Select fields from the drop-down lists to construct a condition. For example, if this condition was selected from the drop-down lists, LaborCost > 0, an error would display if no labor was added to the work activity.
 NOTE: Many of the fields found on work activities can be found under Fields > Current Value ($) and Fields > Previous Value($$). The previous value is the value upon opening a work activity and the current value is what the field value was changed to after the work activity was opened.
- Click Add.
The condition appears under the Fields Conditions section.
- To edit a field condition, expand the details and make any desired changes.
- Click Save.
 IMPORTANT: Test the conditions on the template after creating them to make sure they are working as intended, particularly when using NULL.
|
Create a field condition that checks if a field is populated: $.<FieldName> != NULL. NULL can only be used on numeric or date fields.
|
 EXAMPLE

|
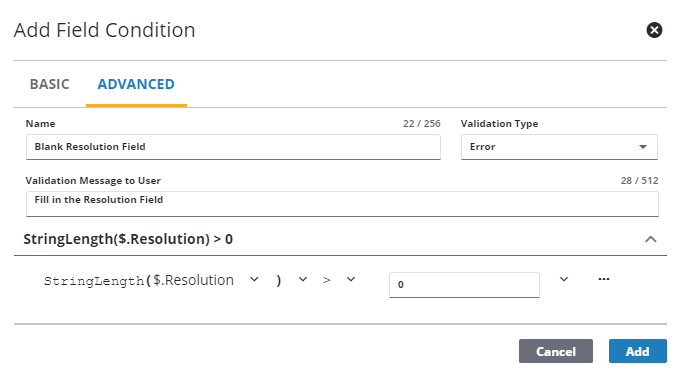
Create a field condition that checks if a field is populated where NULL does not work, like string fields: StringLength($.<FieldName>) > 0. If the field is blank in the database, "!= NULL" does not work. Instead, you need to check that the field length is greater than 0.
|