Configure Service Resource Security
Only GIS calls outside of the maps use the Security Type settings on Service Resources. The Esri Identity Manager control is used for the map.
- Click the Service Resources tab.
- Select a service resource from the Service Resources panel.
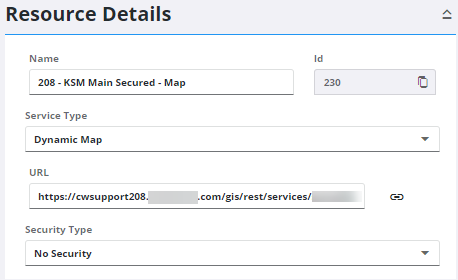
There are four security types that can be assigned to a resource: No Security, OAuth 2 App, OAuth2 User, and Token.
No Security is used if your services do not have security.
- To set No Security as the security type, select it from the Security Type drop-down list.
OAuth2 App is used if you use ArcGIS Online or Portal for ArcGIS and want application-based security. This option allows you to use an app ID instead of your ArcGIS Online login or password.
 NOTE: If you want to access private content within an organization or content that has been shared with a user, you must use the named user login pattern for authentication unless using premium content or services hosted by Esri. See Esri's Limitations of App Login documentation for more information.
- To set OAuth2 App as the security type, select it from the Security Type drop-down list.
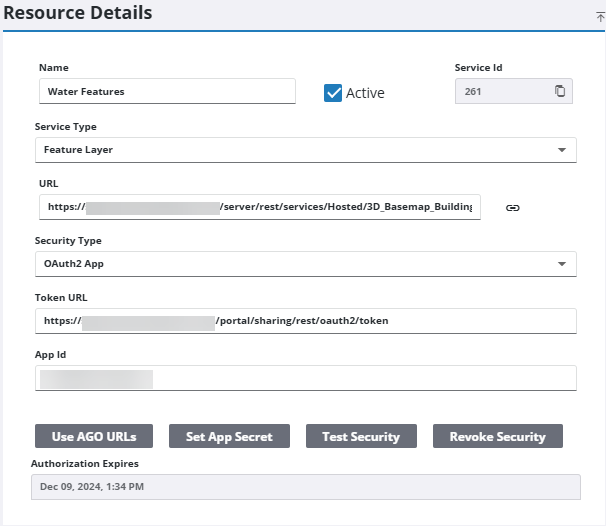
- Enter the Token URL from your ArcGIS Online account, or click Use AGO URLs to populate this field with the URL used by ArcGIS Online.
- Enter the App Id from your ArcGIS Online account.
- Click Set App Secret to set the app secret (password).
- Click Test Security to ensure that there is a valid token for the service.
The Authorization Expires field displays the date that the refresh token expires.
 IMPORTANT: For existing service resources, this field does not display the expiration until the service is reauthorized.
OAuth2 User is used if you use ArcGIS Online or Portal for ArcGIS and want user-based security.
- To set OAuth2 User as the security type, select it from the Security Type drop-down list.
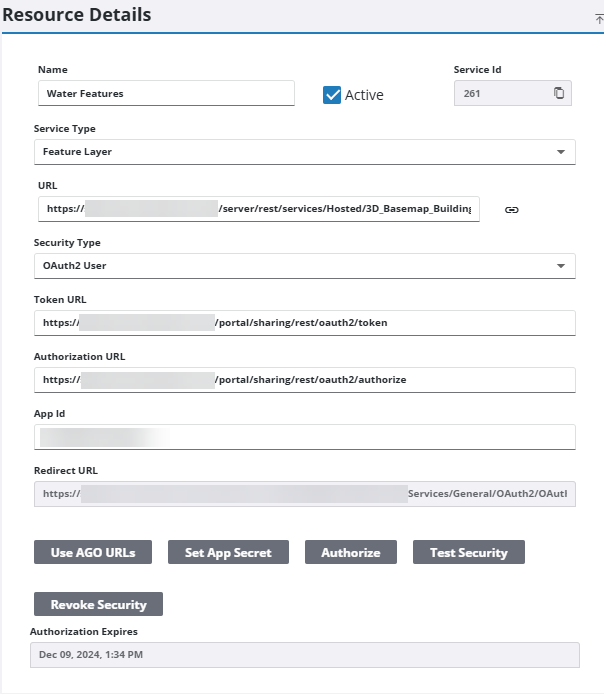
- Enter the Token URL from your ArcGIS Online or Portal for ArcGIS account, or click Use AGO URLs to populate this field with the URL used by ArcGIS Online.
- Enter the Authorization URL from your ArcGIS Online account, or click Use AGO URLs to populate this field with the URL used by ArcGIS Online. The Authorization URL is slightly different than the Token URL.
- Enter the App Id from your ArcGIS Online or Portal for ArcGIS account.
The Redirect URL is the URL that you need to configure in ArcGIS Online or Portal for ArcGIS. The URL ends with OAuthRedirect.aspx.
- Click Set App Secret to set the app secret (password).
- Click Authorize to authorize the security information that you have entered.
NOTE: To register an app in ArcGIS Online or Portal for ArcGIS so Trimble Unity can authorize against it, see the related Esri documentation here.
- Click Test Security to ensure that there is a valid token for the service.
- Click Revoke Security to revoke the token for the service.
The Authorization Expires field displays the date that the refresh token expires.
IMPORTANT: For existing service resources, this field does not display the expiration until the service is reauthorized.
Token is used if you use token-based security. This is useful if you are externalizing and want your services accessible from anywhere, but still secured.
- To set Token as the security type, select it from the Security Type drop-down list.
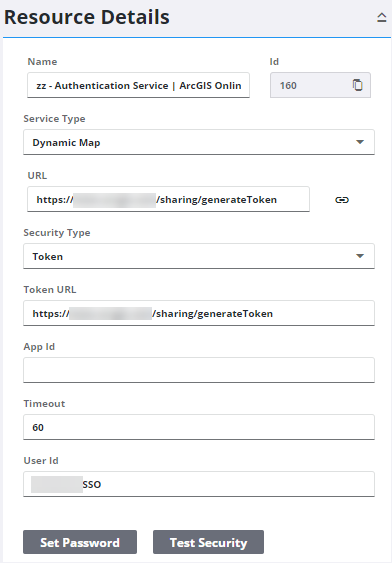
- Enter the Token URL that Trimble Unity uses to get the token. This URL is based on the name of your Esri server.
- Enter the number of minutes that the token lasts in the Timeout field. The default is 60. Make sure that this value does not exceed what has already been configured in ArcGIS Enterprise.
- Enter the User Id of the user you use with your Esri server. For security reasons, the password is not displayed on this page.
- To set the password for the first time, click Set Password. To change the existing password, click Change Password.
- Click Test Security to ensure
- that there is a valid token for the service.
After Token is set as the security for the service resource, it appears highlighted in the Service Resources panel.
For more information on security types, see Service Resources Fields.
NOTE: Changes are automatically saved and verified by a notification at the bottom of the page.

