Configure Public Access Preferences
|
|
 PREREQUISITES:
- From the home page, click Admin and click Preferences.
- Click the Permitting tab.
 NOTE: Changes are automatically saved and verified by a notification at the bottom of the page.
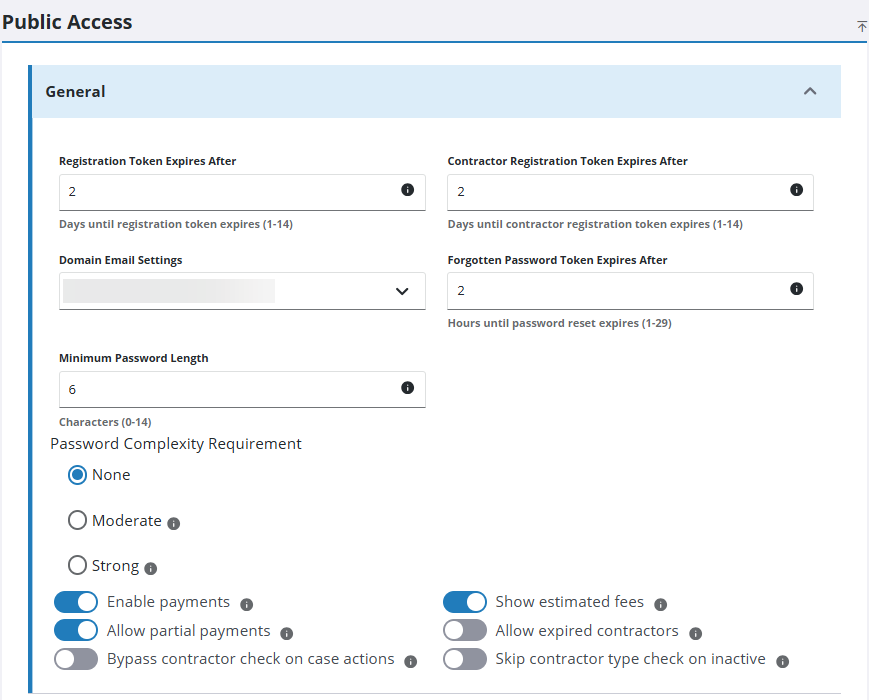
- Expand the General section on the Public Access panel.
- Enter the number of days that a registration token remains valid in the Registration Token Expires After field.
- Enter the number of days that a contractor registration token remains valid in the Contractor Registration Token Expires After field.
- Select the Domain Email Settings from the drop-down list to apply them to the Public Access user's login.
- Enter the number of hours a forgotten password token remains valid in the Forgotten Password Token Expires After field.
- Enter the Minimum Password Length.
- Select the Password Complexity Requirement, either None, Moderate, or Strong.
- Turn on Enable payments to allows users to make payments as the final step of the create process.
- Turn on Show estimated fees to provide an estimate of the total fees for applications that include fees based on status changes.
- Turn on Allow partial payments to allows users to make partial payments by changing the payment amount.
- Turn on Allow expired contractors to allow expired contractors to appear in the selection list. By default, contractors with expired licenses do not appear in the contractors selection list.
- Turn on Bypass contractor check on case actions to allow system actions on a case regardless of the contractor's license status.
- Turn on Skip contractor type check on inactive to include inactive contractor types in the selection list.
- Expand the Case Sharing section on the Public Access panel.
- Turn on Share Cases with People and Contractors in Public Access to allow users and contractors to view any cases they are attached to. By default, Public Access users cannot see cases created in Respond.
 IMPORTANT: Use caution when enabling this preference because it allows data to be viewed site wide by both users and contractors. For example, if an organization has a people role where an offender is listed for code enforcement cases and the offender logs in to Public Access, that individual is able to see any cases filed against them. Likewise, when a contractor creates a Public Access account, they are able to see all cases where they are listed as the contractors, including cases created before they created their account.

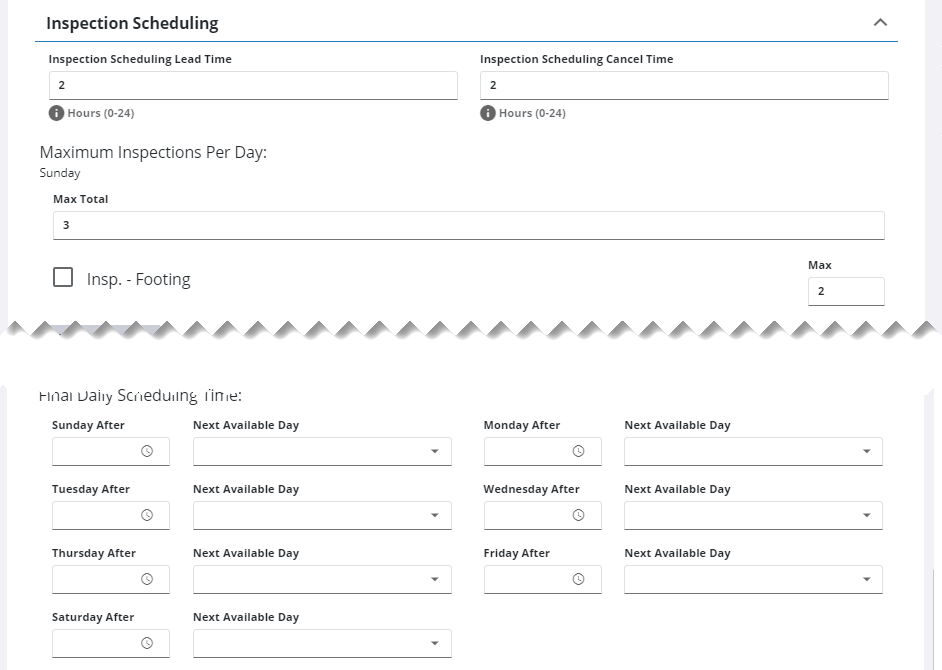
- Expand the Inspection Scheduling section on the Public Access panel.
- Use the Inspection Scheduling Lead Time drop-down list to select the earliest time, from the initial request, that users can schedule an inspection. For example, if you select 4, the earliest time a user is able to schedule an inspection is 4 hours from the time they request the inspection.
- Use the Inspection Scheduling Cancel Time drop-down list to set the latest time an inspection can be canceled. For example, if you select 4, users are able to cancel an inspection until 4 hours before the appointed time. After that, the inspection cannot be canceled.
NOTE: Be aware that the Public Access site has a timeout setting that can affect scheduling or canceling an inspection. For example, if the timeout setting is 20 minutes and the Inspection Scheduling Lead Time is 4 hours, a user could log in to the site 4 hours and 5 minutes before the inspection is scheduled and wait 15 minutes to reschedule or cancel the inspection. That allows the user to reschedule or cancel inside the lead time.
- Enter the maximum number of inspections that can be scheduled on a particular day in the day fields under Maximum Inspections Per Day. If nothing is entered, there is no limit to the number of inspections that can be scheduled that day. Public Access prevents further scheduling for a specific day once it reaches the maximum number of inspections.
- Click Add Record and use the Inspection Type drop-down list and Max count field to limit the daily maximum for a particular type of inspection. Click Add.
- In the Final Daily Scheduling Time section, define daily cutoff hours and subsequent availability. Setting a Friday After time of 4:00 PM with a Monday Next Available Day disables scheduling for the remainder of the weekend and resumes availability on Monday morning.
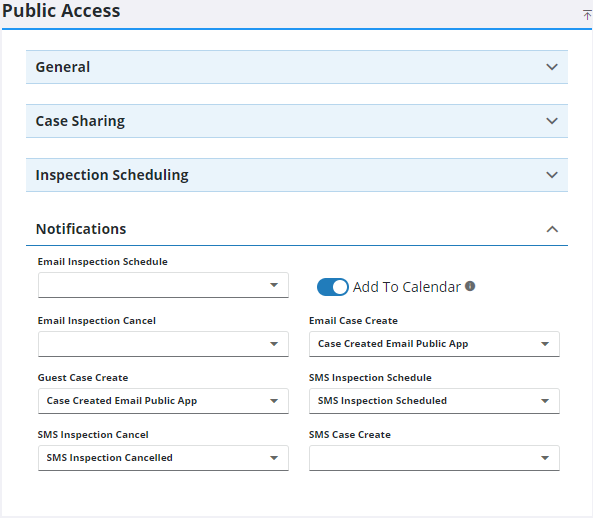
- Expand the Notifications section on the Public Access panel.
- Select the notification type for the following events: Email Inspection Schedule, Email Inspection Cancel, Email Case Create, and Guest Case Create
NOTE: You must have a notification type set up. See Notification Types for more information.
- Turn on Add To Calendar to include an ICS attachment in email notifications so scheduled inspections can be added to a calendar.
- Select the notification type for the following text message events: SMS Inspection Schedule, SMS Inspection Cancel, and SMS Case Create.
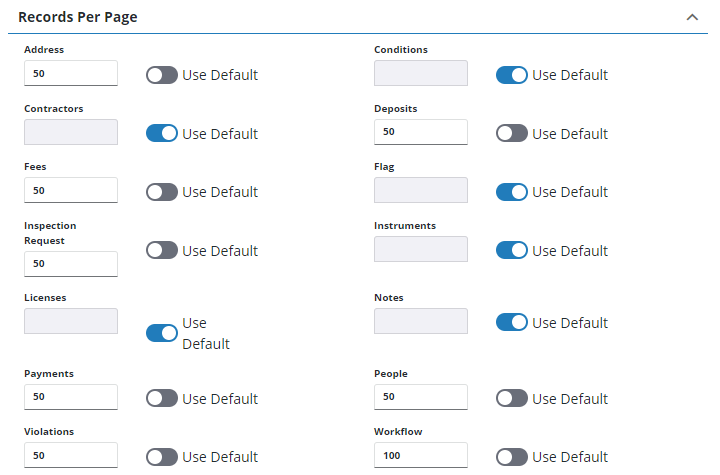
- Expand the Records Per Page section on the Public Access panel.
- Turn off the Use Default switch next to any field you want to edit and enter the numeric value you want in the count field.
- Expand the Guided Access section on the Public Access panel.
- Enter the Font Size, Panel Size, and Panel Size Unit (Percent or Pixels) that you want.


