Create a Workflow
You can create and manage workflows that are used in Trimble Unity for service requests, work orders, and custom inspections. Workflows define the progression of a work activity from start to finish.
- From the home page, click Configure and click All Workflows.
 TIP: Alternatively, open the Work Activity Templates page and click the All Workflows tab.
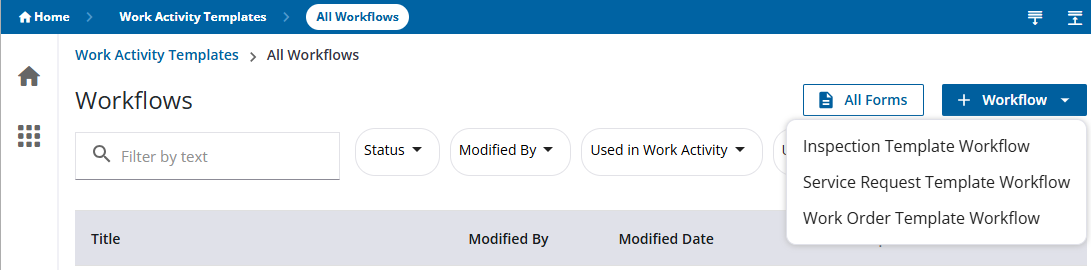
- Click Workflow in the upper-right corner.
- Select either Inspection Template Workflow, Service Request Template Workflow, or Work Order Template Workflow.
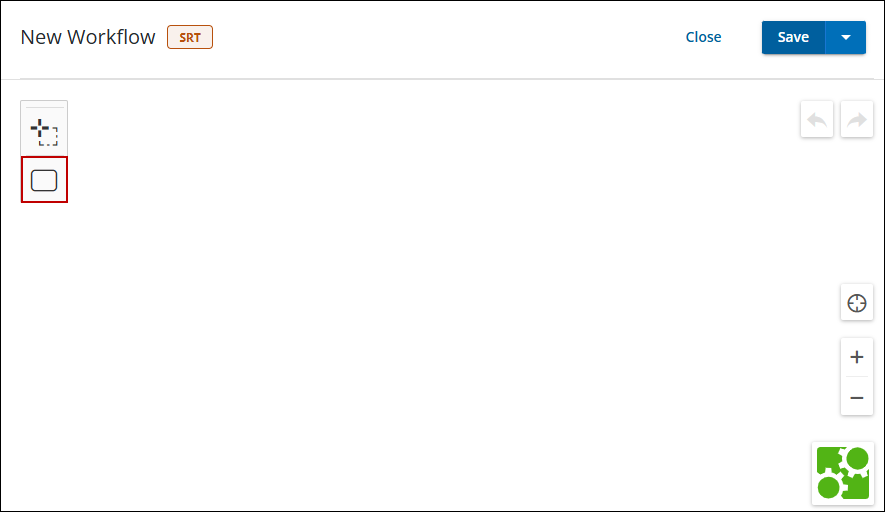
The New Workflow page opens.
- Enter a name for the workflow in the title field in the upper-left corner.
The editor allows you to build out the workflow by drawing the workflow process and progression on a canvas.
- Click Add Status from the menu on the left and drag it to the canvas.
- Select the box you added and select a status from the Status panel on the right side.
- If the status you want already exists, select it.
- If the status you want is not in the list, click Status to add a new one. See Add a New Status for more information.
The first status is automatically set as the initial status on the right side of the editor. When a new work activity (service request, work order, inspection) is created and a workflow is associated to the work activity template, the initial status of the work activity is set to what is defined here.
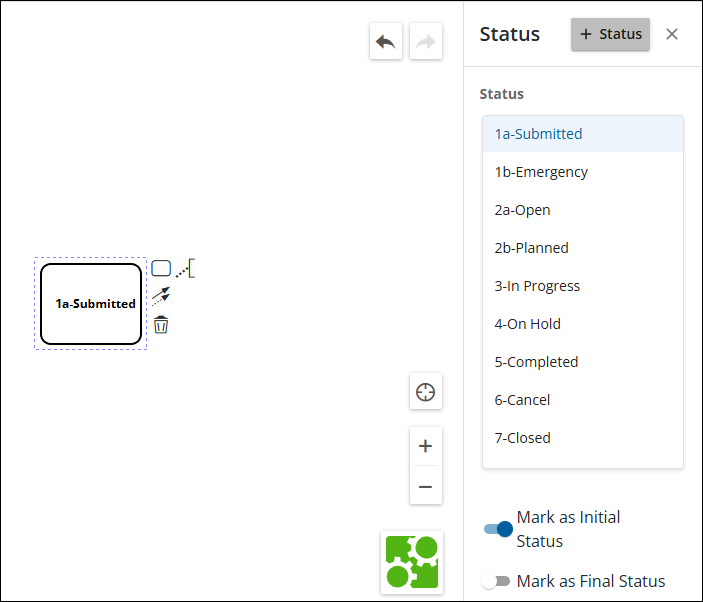
Selecting a status updates the status box on the canvas with the name of the status. You can add follow up statuses that allows the workflow template to progress from the beginning of the workflow to the end.
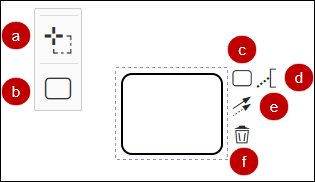
- Activate the lasso tool: Click to select a group of statuses, connections, and/or text annotations and move them around on the canvas.
- Add Status: Click to add a new status box.
- Append Status: Click to create a new status box and connecting to the previous status box, which shows the workflow's progression.
- Append TextAnnotation: Click to attach text that explains the status.
- Append Actions: Click to connect the status box to another status box. This is especially useful if you used Add Status to create a status box and need to create a connection with another status box.
- Remove: Click to remove the status box, connections, or text annotations from the workflow.
The easiest way to add statuses and connections between existing statuses in the workflow is to use Append Status.
- Click or click and drag Append Status on the existing status box to create a new status box. An arrow appears between the statuses and shows the workflow progression path.
TIP: When you click and drag, you can decide how much space is between the status boxes. However, if you just click Append Status, you can click an drag the new status box to change the default space between the status boxes.
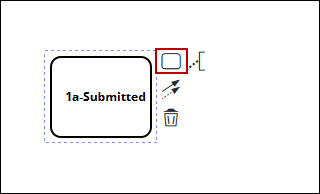
- Provide a name for the status by selecting the status box you added and selecting a status from the Status panel.
Once you have finished building the basic status workflow, you can add the names of the actions. The actions are what appear in Respond and Field as buttons, which are selected to trigger the transition from one status to the next status. For example, the action to trigger the status Reject would be Reject.
- Select the arrow between statuses.
- Enter the Name of the action.
- Select if it is Actionable by the Office, meaning Respond, or Actionable by the Field user.
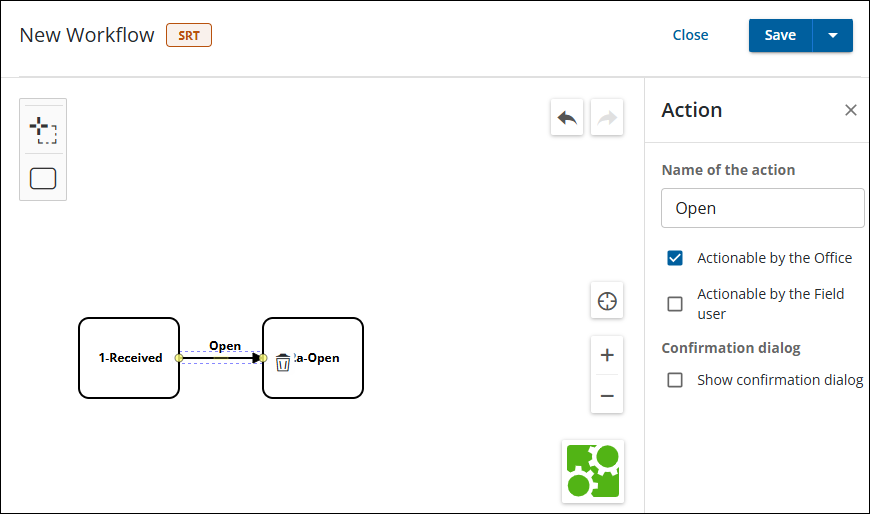
The action name appears as a label on the arrow. You may need to adjust the location of the label to make it more readable.
TIP: The Action Name is displayed to Respond and Field users and used to progress the workflow from one status to another based on the workflow.
- Click Show confirmation dialog to include a custom message to the user when the action is completed that they must read and confirm. Warning messages specific to the action or instructions could be included.
- Enter the message in the Confirmation message field.
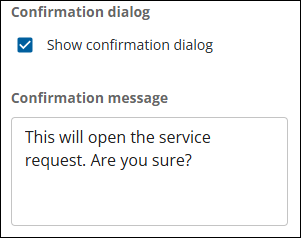
- Repeat the previous steps for all the arrows in the workflow.
- Select the final status and turn on Mark as Final Status in the Status panel.
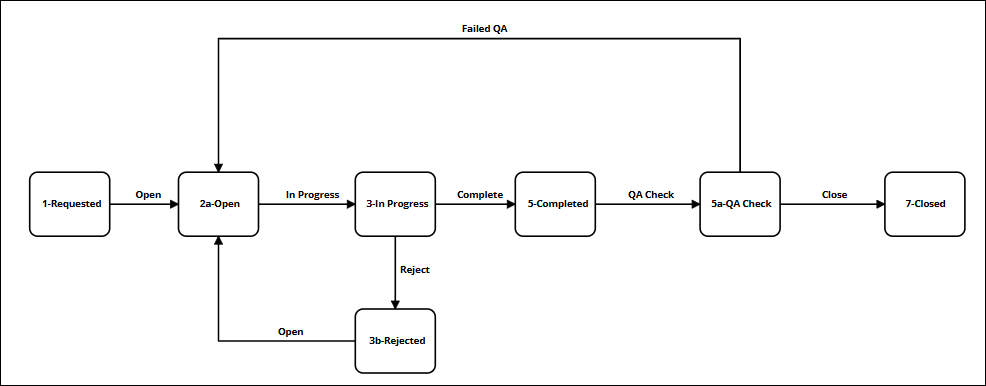
- Once you've completed adding the actions, click Save in the upper-right. This saves the changes as a draft.
- Click Save & Publish to save the changes and push them out live.
Now that the workflow has been created, it can be associated to a work activity template.

