Capture Location Methods
Depending on your GIS Feature type, you can choose how to capture its location using the reticle guide and the Capture Location panel. The reticle guide serves as a visual indicator for where the point will be placed.
 NOTE: The Add Point tool is only available when adding multiple points for linear or polygonal features.
You can capture a single point on the map, allowing you to indicate a single vertex consisting of a coordinate pair (e.g. a valve or a tree).
- Using the reticle guide, tap and drag to your desired location.
- Tap on the map to add a point.
A point is added on the map. To remove the point, tap the map again.
- Tap Add Location.
The Location is added and you are brought back to the Location page, where related metadata fields are automatically saved and populated.
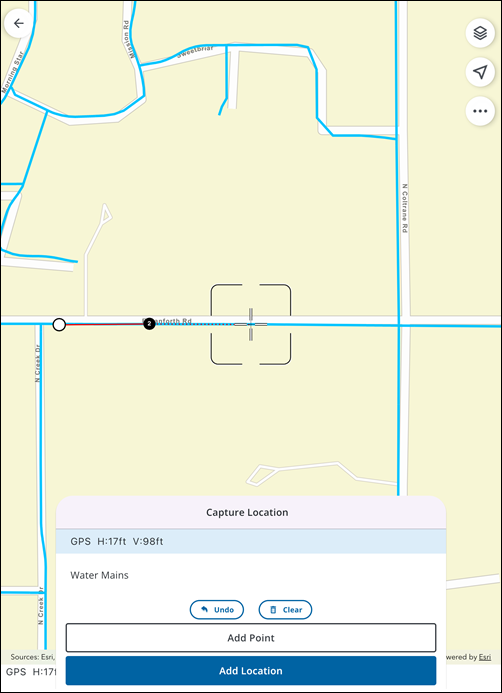
You can capture a line on the map for a linear feature, allowing you to indicate two or more vertices that are connected (e.g. a water main or power line).
- On the Capture Location panel, tap Add Point to add your first point.
- Tap and drag the map to where you want to add your next point. A dotted red line displays a preview of the line segment.
- Tap Add Point again to add the next point and extend the line.
- Repeat Steps 2-3 for additional points if needed.
- Once all points for the line are added, tap Add Location.
The Location is added and you are brought back to the Location page, where related metadata fields are automatically saved and populated. A file with all the GNSS metadata called _gnss_metadata.json is attached to the feature.
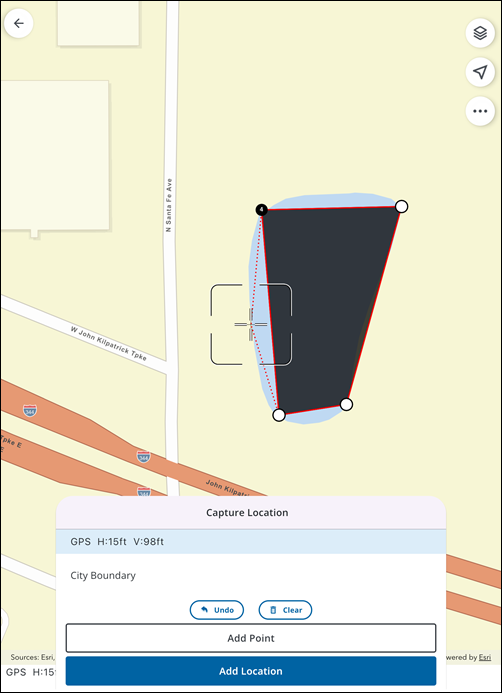
You can capture a polygon on the map, allowing you to collect multiple vertices that define a sequence of connected points that form a closed boundary (e.g. a lake or city limits).
- On the Capture Location panel, tap Add Point to add your first point.
- Tap and drag the map to where you want to add your next point. A dotted red line displays a preview of the line segment, and a shaded area displays a preview of what is contained within the polygon.
- Tap Add Point again to add the next point and create the polygon shape.
- Repeat Steps 2-3 for additional points if needed.
- Once all points for the polygon are added, tap Add Location.
The Location is added and you are brought back to the Location page, where related metadata fields are automatically saved and populated. A file with all the GNSS metadata called _gnss_metadata.json is attached to the feature.