Manage Form Attachments
Field users can add attachments directly to specific form fields rather than navigating away to the general Attachments page, providing immediate visual context for captured photos, documents, or supporting files.
Once an attachment is added directly within a field boundary, the app automatically names the file using the related field description. This automated process saves time and eliminates the frustration of manually renaming attachments, while displaying files directly inline to provide better clarity on which field the data applies to.
View an Attachment
You can view existing form attachments.
- Open a work activity and tap Associated Forms.
The Associated Forms page opens. The displayed count next to the Attach icon indicates how many attachments are associated with the smart form.
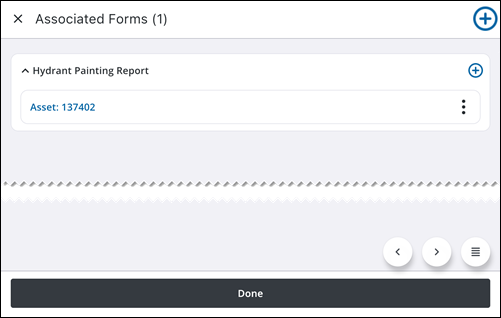
- Tap the Attach icon beside the desired form.
 NOTE: You can also view attachments by tapping on the desired associated form and tapping the Attachments field.
The Attachments page opens, displaying any existing files.
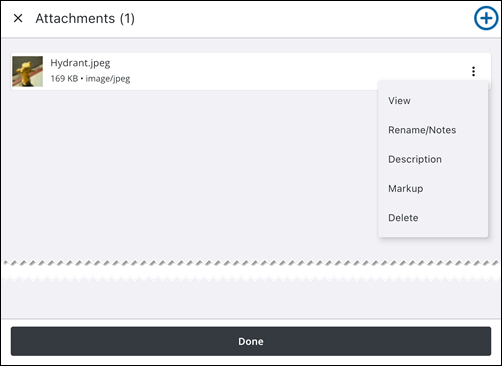
- Tap on the attachment to view it.
- Tap the More Actions icon on an attachment to access more actions.
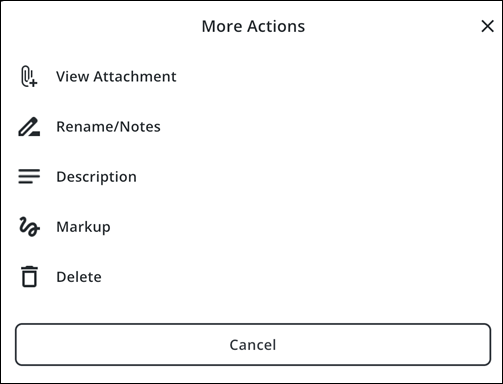
The More Actions menu opens and the following options are available:
- View Attachment: Tap to view the attachment.
- Done: Tap the attachment and tap Done to exit viewing.
- Rename/Notes: Tap to rename the attachment or add a note.
- X icon: Tap to remove the current attachment name.
- Tap the field to enter a new name or add a note.
- Rename: Tap to save the new attachment name.
- Description: Tap to add a description.
- Tap the field to enter a description.
- Update: Tap to update the description.
- Markup: Tap to use markup tools to mark the image with annotations.
- Color picker icon: Tap to change the markup color.
- Draw on the attachment to mark it up.
- Undo: Tap to undo the markup.
- Save: Tap to save the markup.
- Delete: Tap to delete the attachment.
Add an Attachment
You can add an attachment to a form.
- Open the desired work activity and tap Associated Forms.
The Associated Forms page opens.
- Next to the specific smart form you wish to delete, tap the Attach icon.
The Attachment page opens.
- Tap Add.
- Select an attachment type.
- Follow the prompts to add an attachment.
The attachment is added.
- Tap Return to Form to return to the Associated Forms page.
Edit or Mark Up an Attachment
You can edit or mark up an existing smart form attachment by updating details, adding annotations, renaming the file, and more.
- From the Attachments page, tap the More Actions icon besides the attachment you would like to edit.
- Select the desired action:
- View Attachment: Tap to view the attachment.
- Done: Tap the attachment and tap Done to exit viewing.
- Rename/Notes: Tap to rename the attachment or add a note.
- X icon: Tap to remove the current attachment name.
- Tap the field to enter a new name or add a note.
- Rename: Tap to save the new attachment name.
- Description: Tap to add a description.
- Tap the field to enter a description.
- Update: Tap to update the description.
- Markup: Tap to use markup tools to mark the image with annotations.
- Color picker icon: Tap to change the markup color.
- Draw on the attachment to mark it up.
- Undo: Tap to undo the markup.
- Save: Tap to save the markup.
The attachment is edited.
Delete an Attachment
You can delete an existing form attachment.
- From the Attachments page, tap the More Actions icon next to the attachment you want to delete.
- Tap Delete.
A message appears, asking you to confirm you would like to delete the attachment.
- Tap Delete.
The attachment is deleted.

