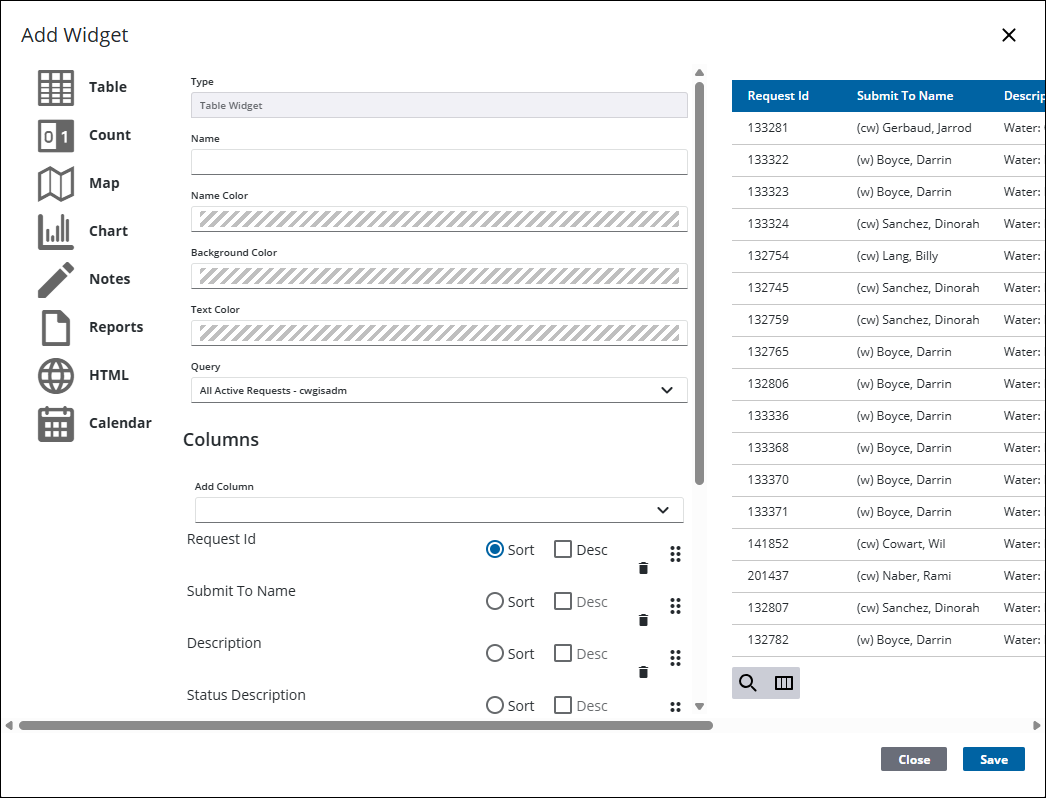
Add a Table Widget
The table widget can list results from any query.
|
|
 PREREQUISITES:
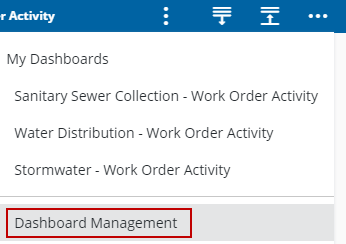
- Click Dashboard.
- Click
 NOTE: The most-recently-viewed dashboards display. To quickly switch between recently-viewed dashboards, see Switch Between Dashboards for more information.
The Dashboard Management page opens.
- Click the edit icon in the Dashboards panel.
- On the Dashboard - Edit page, click the add icon.
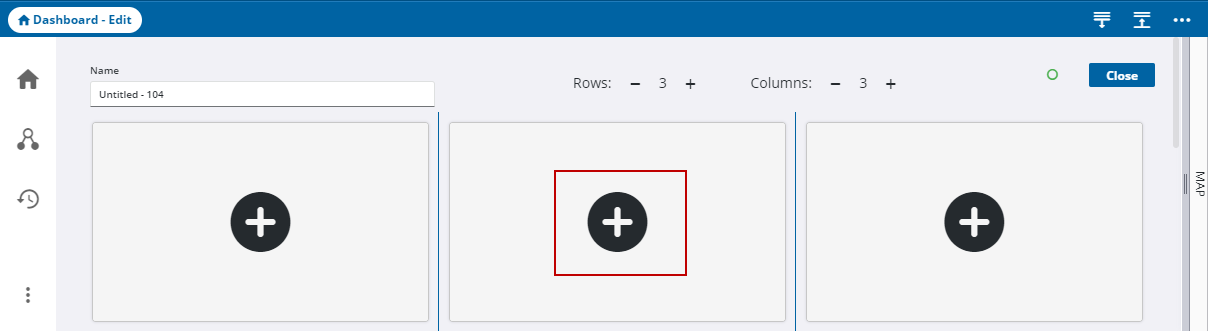
The Add Widget panel opens.
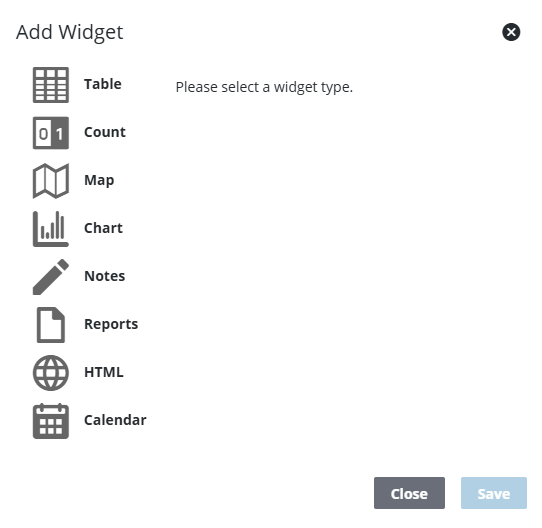
- Select Table.
- Enter the Name.
- Select the Name Color, Background Color, and Text Color.
- Select the Query. Only 100 rows are loaded for the selected query and the text is updated to reflect that the results may be incomplete.
- Select an action.
NOTE: See Query Action Types for more information on query actions.
- Add Columns to the table to add more information to the table.
- Select Sort next to the column you want the table sorted by and clickDesc if you want the information compiled in descending order.
- Click Save.