Add a Notification Setup

This section outlines how to add a new notification setup.

PREREQUISITES:

  • The Notification Setup security function and its associated sub-functions must be selected for the security role you belong to. See Security Roles for more information. Alternately, on the Employee Relates page select Designer/Admin in the Module drop-down list and use the Fields drop-down list to select the notification permissions you want to add. See Assign Permissions to Employees for more information.
  • At least one Condition must be configured. See Conditions for more information.
  • At least one Notification Type or one Notification Type (In-App) must be configured. See Notification Types for more information.

NOTE: Notifications configured in Storeroom are visible on the Notification Setup page in Admin. See Notifications in the Storeroom Guide for Trimble Unity Maintain for more information.

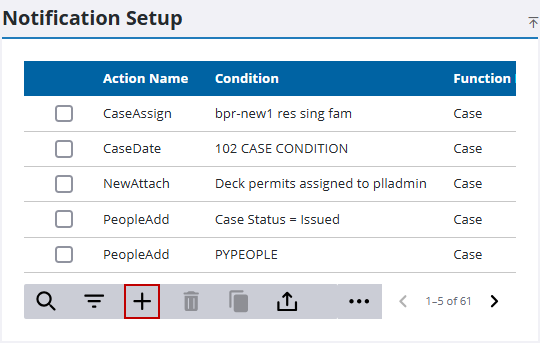
  1. From the home page, click Permitting or Configure and click Notification Setup.
  2. On the Notification Setup panel, click Add record.

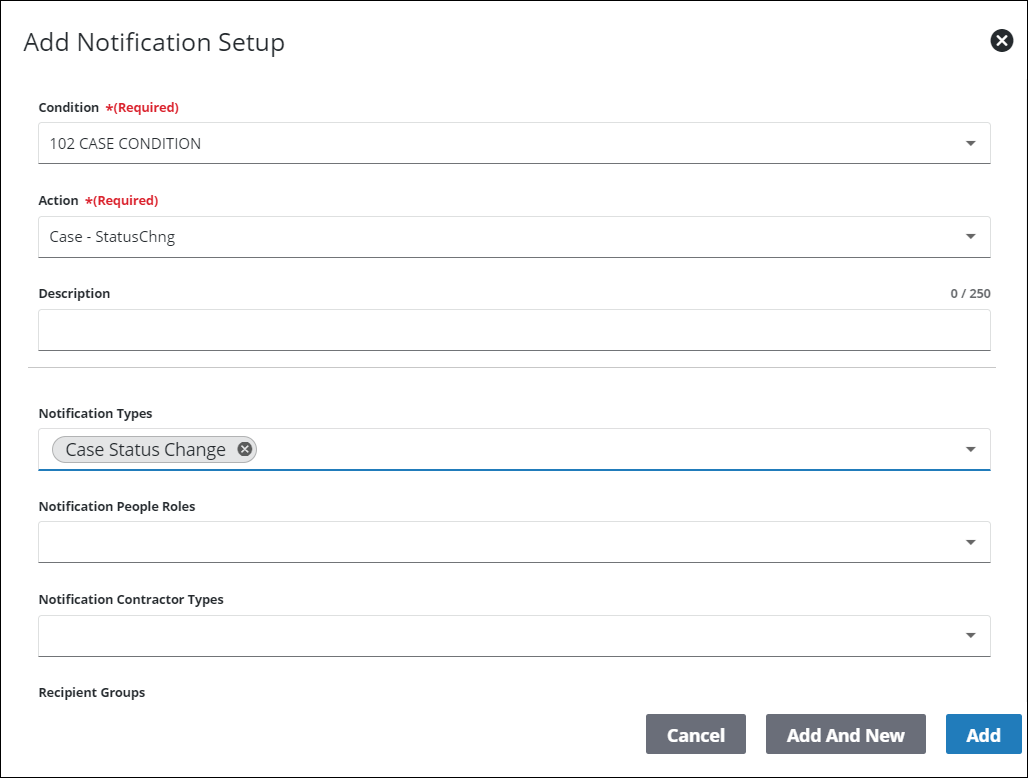
  1. On the Add Notification Setup panel, select a Condition and an Action. These fields are required.

TIP:

  • Selecting the Case - PeopleAdd option in the Action field allows you to set up a notification that is sent whenever an entry is added to the People panel of case in Respond. To configure a notification of this kind, the corresponding Condition selection that is made on the Add Notification Setup panel must be configured on the Notification Conditions page using the CA_PEOPLE_VW table and the ROLE_ID table field, or the CA_PEOPLE table and the NAME table field. See Add a Notification Condition for more information.
  • Selecting the Case - CaseDate option in the Action field allows you to set up a notification that is sent when a configured date is reached. To configure a notification of this kind, the corresponding Condition selection that is made on the Add Notification Setup panel must be configured on the Notification Conditions page with the desired date conditions. See Add a Notification Condition for more information. Notifications configured with the Case - CaseDate action do not apply to cases with a status of Completed or to cases that are more than one year old. To activate a Case - CaseDate notification, contact customer support and provide them with the start date, start time, whole number frequency of the send action per day/week/month, and (an optional) end date.
  • Selecting GisAlert - GisAlertAdd or GisAlert - GisAlertComplete in the Action field allows you to set up a notification that is sent whenever a GIS alert is added or completed on a case. To configure a notification of this kind, the corresponding Condition selection that is made on the Add Notification Setup panel must be configured on the Notification Conditions page using the GIS_ALERTS table and the DATE_CREATED or DATE_COMPLETED table fields. See Add a Notification Condition for more information. GIS alert email notifications cannot populate case-related values, such as Case ID, in the subject line or email body because GIS alerts are tied to an address instead of a specific case.
  1. Enter a Description.
  2. Select an option from the Notification Types field or the Notification Types (In-App) field. Both of these fields show as required at the outset, but when one is populated, the other one becomes non-required. Both fields can be populated, but at least one must be populated.
  3. If you wish to configure any additional fields for the notification setup, select them from the Notification Types, Notification People Roles, Notification Contractor Types, Recipient Groups, and Recipients drop-down lists.
  4. Select Assign To if this notification should be sent to the person the case is assigned to.
  5. For in-app notifications, select the Notification Type (In-App) and the Internal Users who should receive this notification.
  6. Click Add to add a notification setup or Add And New to add a notification setup and create another one.