Case Tasks
You can view and edit case tasks in the app.
Tasks are the individual steps required for a case to progress from application to completion. To add a task to a case, see Add a Task in the Respond Guide for Trimble Unity Maintain and Trimble Unity Permit for more information.
Task types include inspections, reviews, and hearings.
The default query for case tasks automatically displays tasks (most recent results appearing first) that meet the following criteria:
- Available
- Assigned to Current User
- Not in a Completed, Closed, Canceled, or Inactive State
The work activity list displays all of the work activities in your selected work activity type.
- Tap the work activity type drop-down on the Top Navigation menu.
The View panel opens, displaying each activity type along with the number of work activities in each work activity list. The displayed count indicates how many activities of that type are assigned to you. For example, Assigned to me (7) above Service Requests indicates that there are seven service requests assigned to you.
- Tap Case Tasks.
The work activity list updates.
You can edit an existing case task.
- Tap a case task.
- Edit the case task details. See View Work Activity Details for more information.
- Tap Save.
The case task is updated.
 NOTE: Attachments added to a case task are automatically rolled up to the parent case, ensuring the attachment is visible on both the case task and the parent case.
You can view, add, and edit attachments to an existing case task.
- Tap a case task.
- Tap Attachments.
- Tap the Attach icon.
The Add Attachment panel opens.
- Select the type of attachment to add.
- Add the attachment. See Add Attachments for more information.
|
|
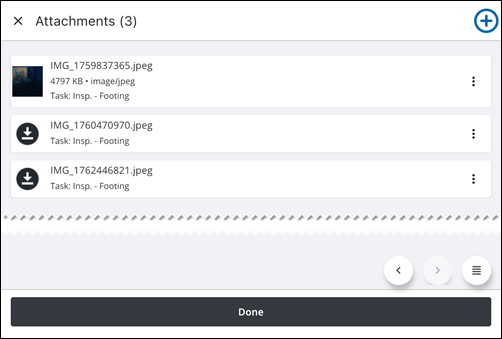
To view and edit an existing attachment, tap the More Actions icon next to a downloaded attachment.
The task name associated with the attachment and the following options are visible from the More Actions menu:
- View Attachment: Tap to view the attachment.
- Done: Tap the attachment and tap Done to exit viewing.
- Rename/Notes: Tap to rename the attachment or add a note.
- X icon: Tap to remove the current attachment name.
- Tap the field to enter a new name or add a note.
- Rename: Tap to save the new attachment name.
- Description: Tap to add a description.
- Tap the field to enter a description.
- Update: Tap to update the description.
- Markup: Tap to use markup tools to mark the image with annotations.
- Color picker icon: Tap to change the markup color.
- Draw on the attachment to mark it up.
- Undo: Tap to undo the markup.
- Save: Tap to save the markup.
- Delete: Tap to delete the attachment.

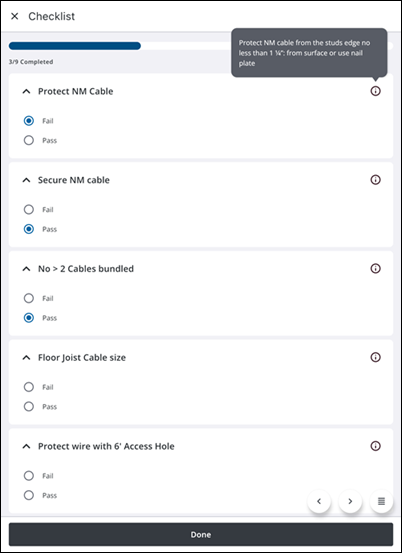
You can view and update checklists in the app.
Case tasks may include associated checklists that outline required items, necessary steps, or further consideration. They are attached to the respective case tasks and should be reviewed and completed as part of the task's workflow. If it is configured by the administrator, a checklist must be completed before the task can be completed in the workflow.
The case task checklists page displays whether checklist items exist and shows the number of completed checklist items versus the total number of items. For example, 3/6 Completed means three out of the six checklist items have been completed. If all checklists are completed, the Checklist field will display a Complete status.
- Tap to open a case task.
- Tap Checklist.
The Checklist page opens with a list of checklist items.
The following options are available from the Checklist page:
- Drop-down icon: Tap to collapse or expand the checklist item view.
- Information icon: Tap to view additional information about a checklist item.
- + Add: Tap to add a comment for the checklist item. Comments on checklist items follow the same threading and reply rules as case task comments. See Manage Case Task and Case Task Checklist Comments and Replies below for details.
- Done: Tap to return to the work order activity details page.
- Select a result for each checklist item.
- When all checklist items are completed, tap Done.
The case task details screen opens and displays a Completed status in the Checklist items field, indicating that all checklist items have been completed for the case task.
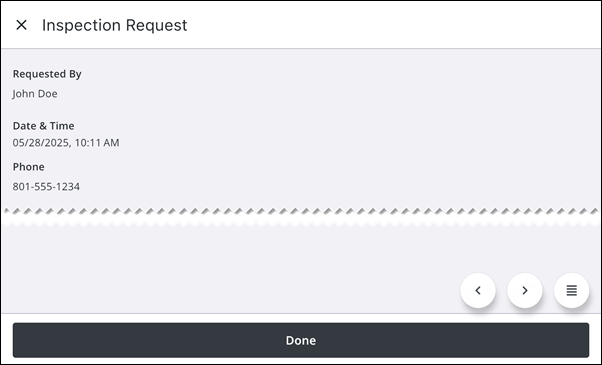
When a task has an inspection request, details including the Requested By user, the request Date & Time, and Phone number can be viewed.
- Open a case task.
- Tap Inspection Request.
The Inspection Request page opens, showing the following details:
- Requested By: The name of the person who requested the inspection.
- Date & Time: The date and time that the inspection request was made.
- Phone: The phone number of the person who requested the inspection.
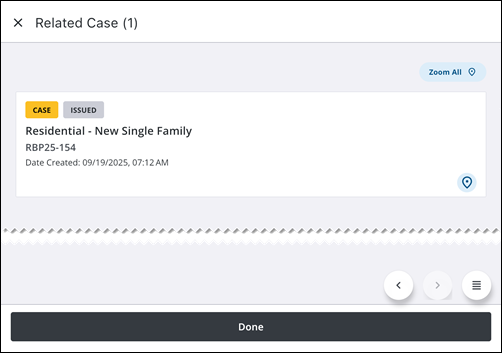
You can view the parent case that is related to the case task.
- Open a case task.
- Tap Related Case.
The Related Case page opens, showing the following details:
- Zoom All: Tap to zoom to the parent case on the map.
- Map icon: Tap to view the parent case on the map.
- To view the parent case, tap on the summary card.
The parent case opens.
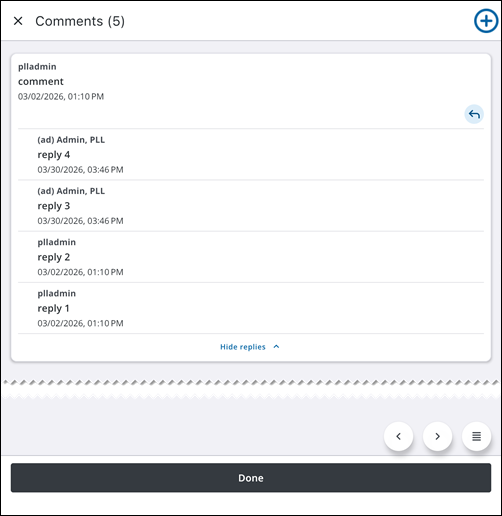
Threaded replies are supported for both case tasks and individual checklist items, organizing communication into clear conversations so inspectors and office staff can stay aligned on specific requirements.
You can view, add, or reply to comments on a case task or case task checklist item.
View Existing Comments
You can see if a case task has existing comments directly from the case task details page.
NOTE: For case task checklist items, the comments appear directly under the checklist item.
The Comments row displays the amount of comments associated with the case task.
For example, Comments (5) indicates a total for five comments (including replies).
- From the case task details page, tap Comments.
The Comments page opens
Comment threads are collapsed by default, with primary comments being visible directly.
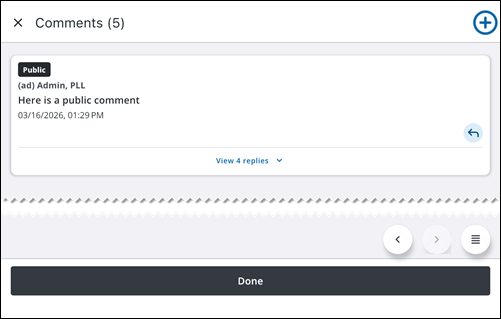
- Tap View [#] replies to expand a comment thread. The most recent comment appears at the top of the list.
Add a New Comment
You can add a new comment.
- Tap the Add icon to add a new comment to the case task.

The Add Comment panel opens.
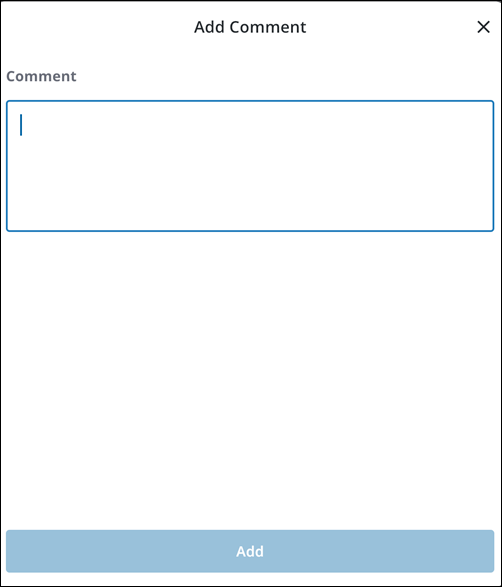
- Enter the comment into the Comment box.
- Tap Add.
The Comments page is updated.
Add a New Reply to an Existing Comment
You can add a new reply to an existing comment thread.
- Locate the parent comment that you want to add a reply comment to.
- Tap the Reply icon to add a new reply to an existing comment thread.
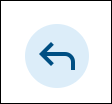
The Reply to Comment panel opens.
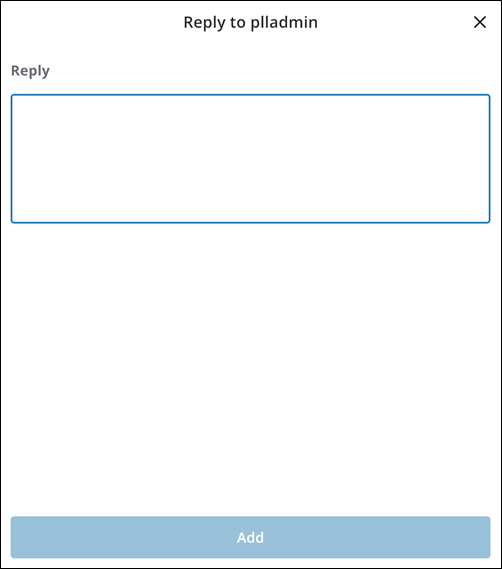
- Enter the reply into the Comment box.
- Tap Add.
The Comments page is updated. The newest comment appears at the top of the list.

