Configure Site Options
|
|
 PREREQUISITES:
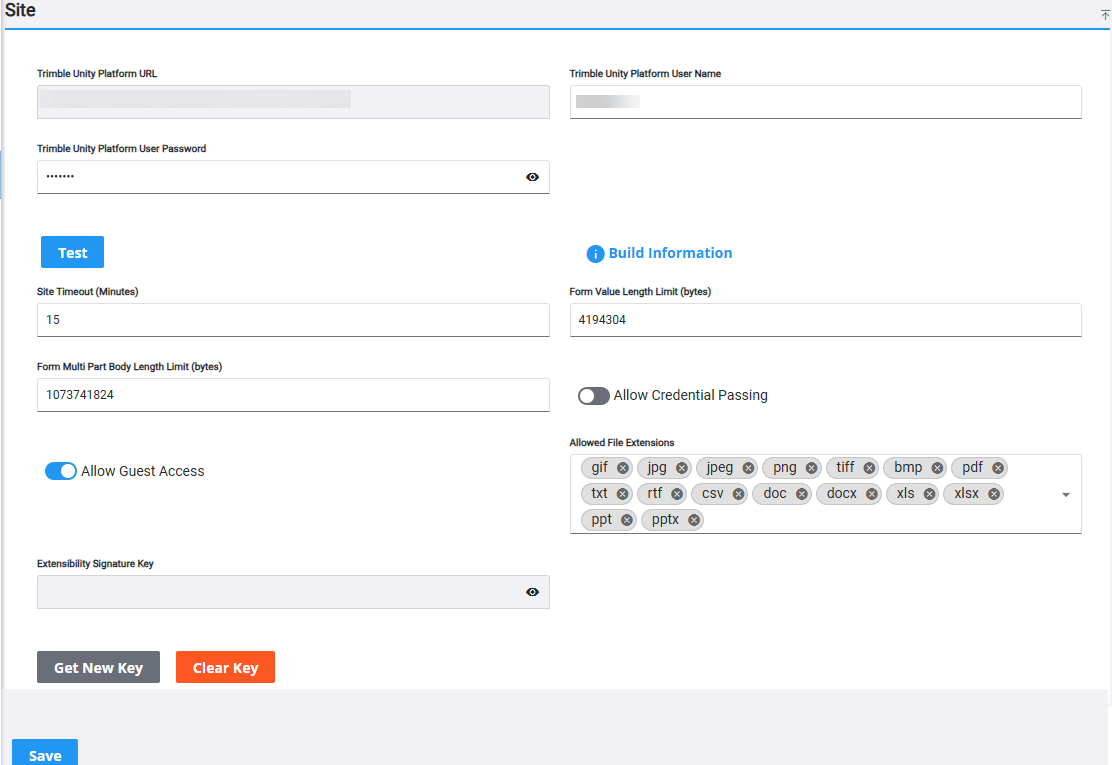
 NOTE: The Trimble Unity Platform URL is configured as part of the initial deployment effort and cannot be edited.
- Open the URL for your Public Access site using the address format https:\\<host>\<site_alias>\login.
A notice that the site has not been configured displays on the Login page.
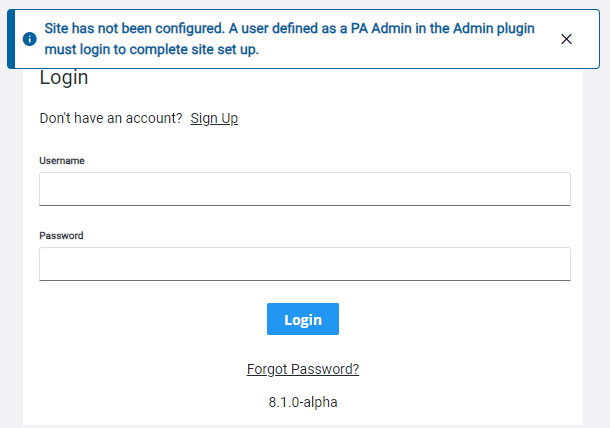
- Enter the administrator credentials that were configured for your instance of Trimble Unity Permit and click Login.
The Site Config page displays.
- Make any necessary edits to the Site, GIS, reCAPTCHA, and Payment panels. See Site Panel, GIS Panel, reCAPTCHA Panel, and Payment Panel for more information.
- Click Save at the bottom of the screen to save all changes.
- Click Save on the confirmation panel. This logs all users out of the site.
After initial configuration options have been made with an administrator login related to a new site deployment (see Configure New Site), all subsequent administrator login actions open the Public Access Home page.
- Open the URL for your Public Access site using the address format https:\\<host>\<site_alias>\login.
The Home page opens.
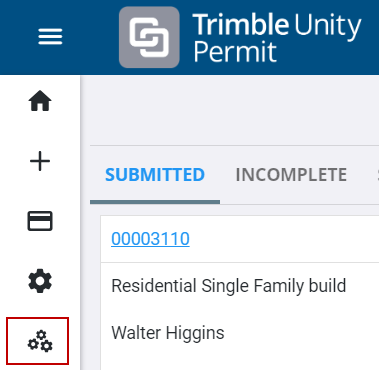
- From the side menu, click Site Config.
- Make any necessary edits to the Site, GIS, reCAPTCHA, and Payment panels. See Site Panel, GIS Panel, reCAPTCHA Panel, and Payment Panel for more information.
- Click Save at the bottom of the screen to save all changes.
- Click Save on the confirmation panel. This logs all users out of the site.
- Enter the applicable Trimble Unity Platform User Name and Trimble Unity Platform User Password.
NOTE: The initial map extent shown in Public Access is the initial map extent defined for the user entered in the Trimble Unity Platform User Name field. This user must be added to the service definition and the service definition must also have services marked Public for these to display within Public Access.
- Click Test.
A message indicates whether the configuration is valid, and whether the user credentials are valid.
- Enter the number of minutes that the site will time out in the Site Timeout (Minutes) field. The default is 15 minutes.
- Enter the character value limit for forms in the Form Value Length Limit field.
- Enter the character value limit for multi-part forms in the Form Multi Part Body Length Limit field.
- Turn on Allow Credential Passing to allow Public Access users to be authenticated by another site.
- Turn on Allow Guest Access to enable guest access.
- In the Allowed File Extensions field, specify the types that can be added in Public Access. Use the drop-down list to select or remove file extension types.
- Click Get New Key below the Extensibility Signature Key field to generate a unique key that can be used to validate third-party widgets and ensure they are from a legitimate source using API calls. Another way to validate API tokens is through a call to the Public Access site. See Validate a Token through a URL for more information.
- Click Show Password, then copy the key and manually save it to a safe location for future reference.
- To clear the key and create a new one, click Clear Key then click Get New Key.
 IMPORTANT: The way the tokens are validated has changed slightly, and code validated prior to Trimble Unity Permit Public Access 9.0 must be updated to ensure continued functionality.
- Click Save at the bottom of the screen to save all changes.
NOTE: Software build information is available by clicking Build Information.
- Click Save on the confirmation panel. This logs all users out of the site.
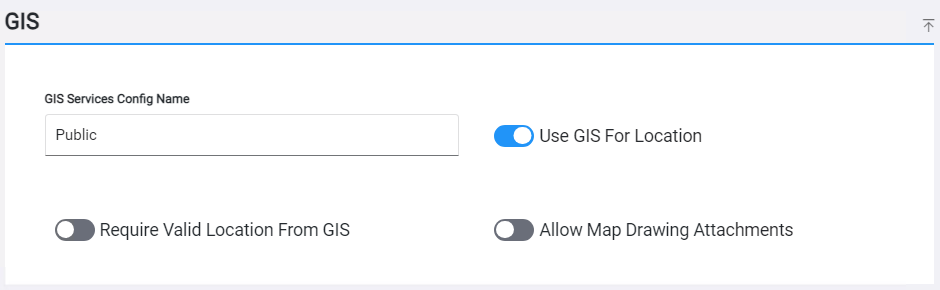
- In the GIS Services Config Name field, enter Office, Tablet, Mobile, Public, or Other to specify which map services from the service user's service definition to use in Public Access. The default is Public. See Configure GIS Services in the Admin Guide for Trimble Unity Maintain and Trimble Unity Permit for more information.
- Turn on Use GIS For Location to use the user's location when creating a case.
- Turn on Require Valid Location From GIS to require that users enter a valid location on the case. If this is not enabled, users can enter an address without geocoding it. Not using a geocoded address means the location field is populated on the case but the X and Y coordinates are not populated.
- Turn on Allow Map Drawing Attachments to allow users to draw on the map and attach the drawing to the case.
- Click Save at the bottom of the screen to save all changes.
- Click Save on the confirmation panel. This logs all users out of the site.
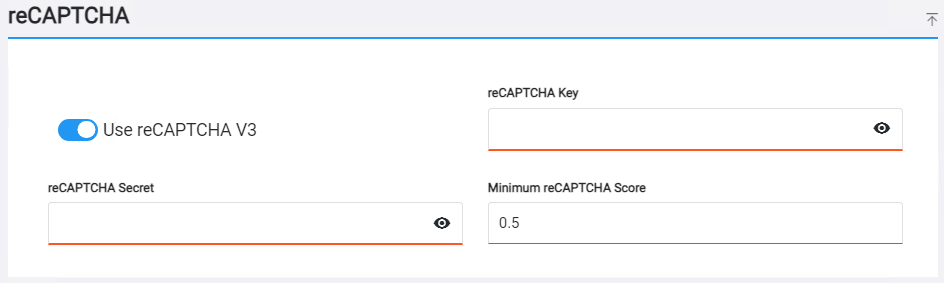
- Turn on Use reCAPTCHA V3 if you are using reCAPTCHA.
- Copy the site key from your Google reCAPTCHA settings page and enter it in the reCAPTCHA Key field.
- Copy the secret key from your Google reCAPTCHA settings page and enter it in the reCAPTCHA Secret field.
- The default Minimum reCAPTCHA Score is 0.5 but you can change it.
- Click Save at the bottom of the screen to save all changes.
- Click Save on the confirmation panel. This logs all users out of the site.
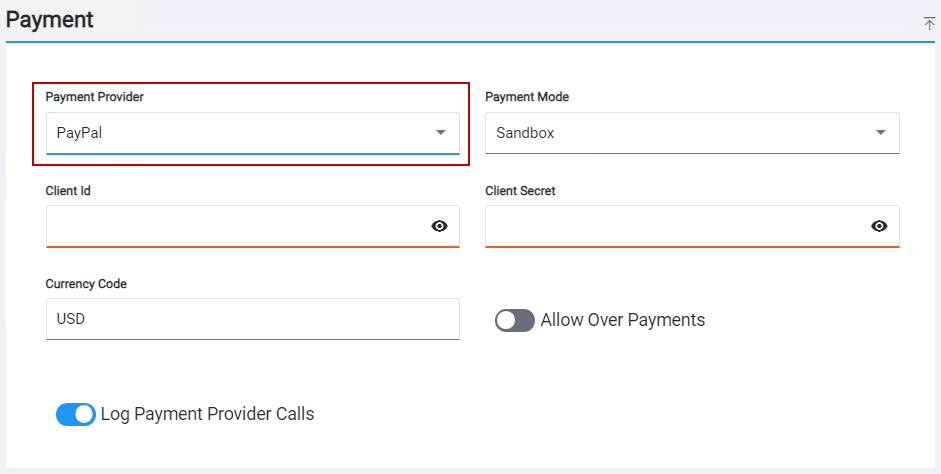
- Select Paypal, AuthorizeNet, or XpressBillPay from the Payment Provider drop-down list. Additional configuration fields show depending on the selected payment provider.
- Alternatively, you can select None from the Payment Provider drop-down list to bypass setting up a payment provider.
- Turn on Log Payment Provider Calls to create a log of payment provider calls that can be viewed and downloaded from the Payment Logs tab on the Admin page. See Payment Logs for more information.
- Click Save at the bottom of the screen to save all changes.
- Click Save on the confirmation panel. This logs all users out of the site.