Smart Forms
Smart forms (also known as associated forms) simplify and standardize the collection, validation, and management of data across various work activities. These complex, dynamic forms are configured in Admin, can be added, edited, or deleted from a work activity in the Trimble Unity Field app, and then managed in Respond.
 NOTE: Smart forms are available for inspection, work order, and service request work activity types.
Work activities can have one or more smart forms.
 IMPORTANT: Saved queries are not supported for smart forms.
To manage the creation, collection, and reporting of data across work activities, smart forms follow a standardized three-stage workflow: Admin, Field, and Respond.
Step 1: Create the Form in Admin
Smart forms are created, designed, and configured in Admin. Once a smart form is created, it can be reused for other work activities.
- In Admin > Configure > All Forms, create a form. See
- Define fields, layout, and scripting logic (including advanced calculations and conditional rules).
- Define the form's required spatial data, including geometry type, accuracy requirements, tilt tolerance, and manual digitizing settings.
- Associate the form to one or more work activity templates. See
Step 2: Collect Data for the Form in Trimble Unity Field for Maintain
Data is collected in the field using the Trimble Unity Field for Maintain app. Work activities can have multiple smart forms, which are called associated forms in the app.
- Create a work activity using a work activity template associated with the form created in Admin. See
- Add an associated form to the work activity. See
- Capture various data types, including text, signature, barcode, user, geometry, and attachments.
- Sync the work activity to Respond. See
Step 3: Manage the Form in Respond
Collected data can then be viewed and managed in Respond.
- Open the work activity in Respond.
- View or edit the form on the Associated Forms panel. See
Smart forms requiring high-precision location data for asset management can be configured in Admin to enforce accurate data collection.
The following settings can be configured in Admin for smart forms:
- Accuracy Tolerance: Ensures GPS accuracy is within the specified tolerance when collecting locations in the Trimble Unity Field app.
- Tilt Tolerance (degrees): When using a GPS receiver with tilt compensation, ensures the angle of tilt on the receiver is within the specified tolerance.
- Disable Manually Digitizing: Forces the user to collect a location using GPS, by disabling the feature to capture it manually on the map.
- Geometry Type: Define the type of feature the form is designed to capture.
- Point
- Line
- Polyline
See Create a Form in the Admin Guide for Trimble Unity Maintain and Trimble Unity Permit for more information.
Smart forms are managed from the Associated Forms page of a work activity. The number in parentheses indicates the number of forms currently attached to that work activity. For example, Associated Forms (2) indicates that the work activity has two associated forms.
- Open a work activity.
- Tap Associated Forms.
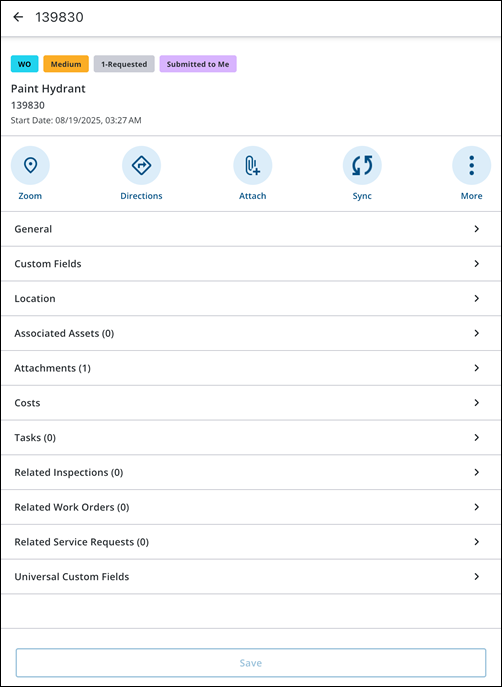
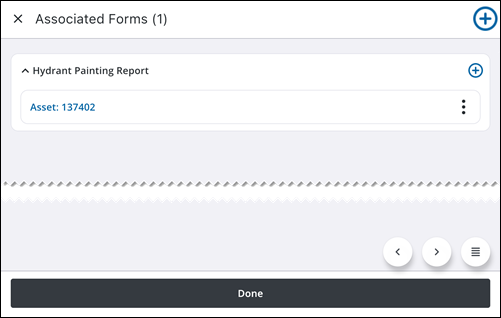
The Associated Forms page opens.
You can perform the following actions from this page:
- Drop-down icon: Tap to expand or collapse an associated form.
- More Actions icon: Tap to open the More Actions menu.
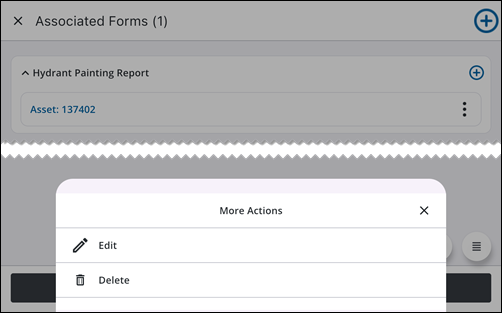
- Edit: Tap to edit the associated form.
- Delete: Tap to delete the associated form.
- X icon: Tap to exit the More Actions menu.
- Add icon: Tap to add a new associated form.
You can add a smart form to a work activity.
|
|
 PREREQUISITES:
Smart forms support various field types to optimize data collection in the field, including the following:
- Barcode: Tap the barcode field to activate the device's camera. Scan the barcode to automatically populate the field with the barcode's information.
- Signature: Tap the signature field to record the signature.
- User: Tap the user field to record the name of the user.
- Open the desired work activity and tap Associated Forms.
The Associated Forms page opens.
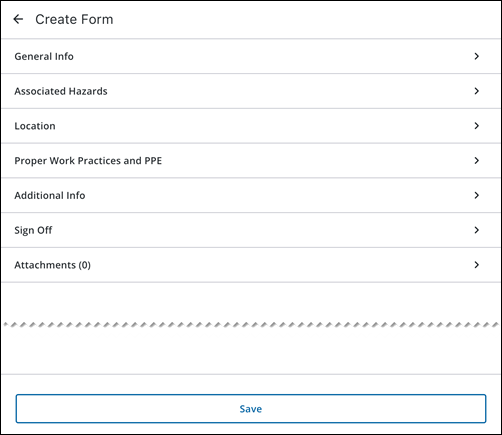
- Tap the Add icon.
The Create Form page opens.
- Enter the required information into the fields.
NOTE: Smart forms react automatically to the data you enter, meaning that fields or sections may appear or disappear instantly based on a selection you make in a certain field. For example, selecting Yes on a smart form results in different follow-up fields appearing than if you select No.
- Tap Save.
The smart form is saved.
You can modify data in a form that has already been added to a work activity.
You can edit existing smart forms on a work activity.
- Open the desired work activity and tap Associated Forms.
The Associated Forms page opens.
- Next to the specific associated form you wish to modify, tap the More Actions icon.
The More Actions menu opens.
- Tap Edit.
The smart form opens.
- Edit the fields that require updates.
- Tap Save.
The smart form is updated.
You can delete existing smart forms from a work activity.
- Open the desired work activity and tap Associated Forms.
The Associated Forms page opens.
- Next to the specific smart form you wish to delete, tap the More Actions icon.
The More Actions menu opens.
- Tap Delete.
A message appears, asking you to confirm you would like to delete the form.
- Tap Delete.
The smart form is permanently deleted.
You can view, add, edit, or delete attachments (e.g. photos, videos, documents, etc.) directly on smart forms.
View an Attachment
You can view existing smart form attachments.
- Open the desired work activity and tap Associated Forms.
The Associated Forms page opens.
- Tap the smart form you would like to work with.
The smart form page opens.
- Tap Attachments.
The Attachments page opens, displaying any existing files.
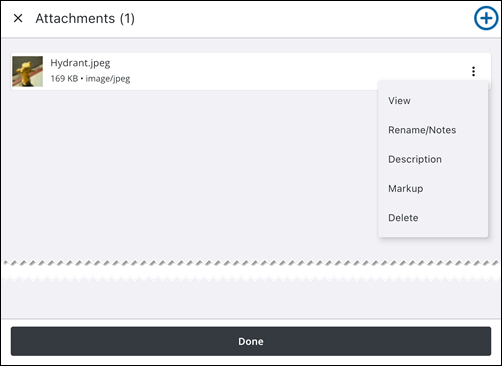
- Tap on the attachment to view it.
- Tap the More Actions icon on an attachment to access more actions.
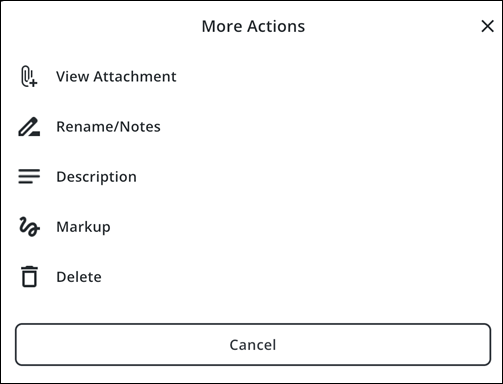
The More Actions menu opens and the following options are available:
- View Attachment: Tap to view the attachment.
- Done: Tap the attachment and tap Done to exit viewing.
- Rename/Notes: Tap to rename the attachment or add a note.
- X icon: Tap to remove the current attachment name.
- Tap the field to enter a new name or add a note.
- Rename: Tap to save the new attachment name.
- Description: Tap to add a description.
- Tap the field to enter a description.
- Update: Tap to update the description.
- Markup: Tap to use markup tools to mark the image with annotations.
- Color picker icon: Tap to change the markup color.
- Draw on the attachment to mark it up.
- Undo: Tap to undo the markup.
- Save: Tap to save the markup.
- Delete: Tap to delete the attachment.
Add an Attachment
You can add an attachment to a smart form.
- From the Attachments page, tap the Add icon.
The Add Attachment panel opens.
- Select an attachment type.
- Follow the prompts to add an attachment.
The attachment is added.
Edit or Mark Up an Attachment
You can edit or mark up an existing smart form attachment by updating details, adding annotations, renaming the file, and more.
- From the Attachments page, tap the More Actions icon besides the attachment you would like to edit.
- Select the desired action:
- View Attachment: Tap to view the attachment.
- Done: Tap the attachment and tap Done to exit viewing.
- Rename/Notes: Tap to rename the attachment or add a note.
- X icon: Tap to remove the current attachment name.
- Tap the field to enter a new name or add a note.
- Rename: Tap to save the new attachment name.
- Description: Tap to add a description.
- Tap the field to enter a description.
- Update: Tap to update the description.
- Markup: Tap to use markup tools to mark the image with annotations.
- Color picker icon: Tap to change the markup color.
- Draw on the attachment to mark it up.
- Undo: Tap to undo the markup.
- Save: Tap to save the markup.
The attachment is edited.
Delete an Attachment
You can delete an existing smart form attachment.
- From the Attachments page, tap the More Actions icon next to the attachment you want to delete.
- Tap Delete.
A message appears, asking you to confirm you would like to delete the attachment.
- Tap Delete.
The attachment is deleted.

