Make a Payment
Payments can be made towards fees or deposits as well as made towards fees from paid deposits that are associated to a case. The administrator can set specific fees which can be paid using a contractor's escrow account. Making a payment towards fees or deposits uses the same process in the Make Payment panel, but is accessed differently.
 TIP: See Make a Payment on a Case for a quick start guide on this subject.
 NOTE: Custom forms can be configured by the administrator and applied to specific areas in the UI, such as based on a specific template, fees, comments, and more. See Custom Form in the Admin Guide for Trimble Unity Maintain and Trimble Unity Permit for more information. When a case is cloned, custom form values are copied to the child case. If the administrator added encrypted custom forms, you will see dots when typing in the field. A view icon allows you to view the encrypted text in the field.
You can make a payment towards any fees and deposits associated to a case.
|
|
 PREREQUISITES:
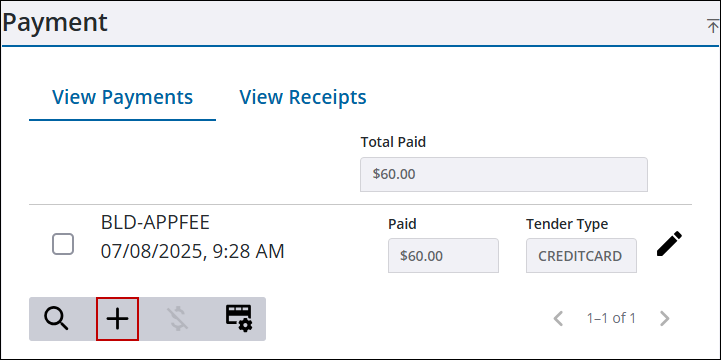
- Open a case and navigate to the Payment panel.
- Click Add record to open the Make Payment panel.
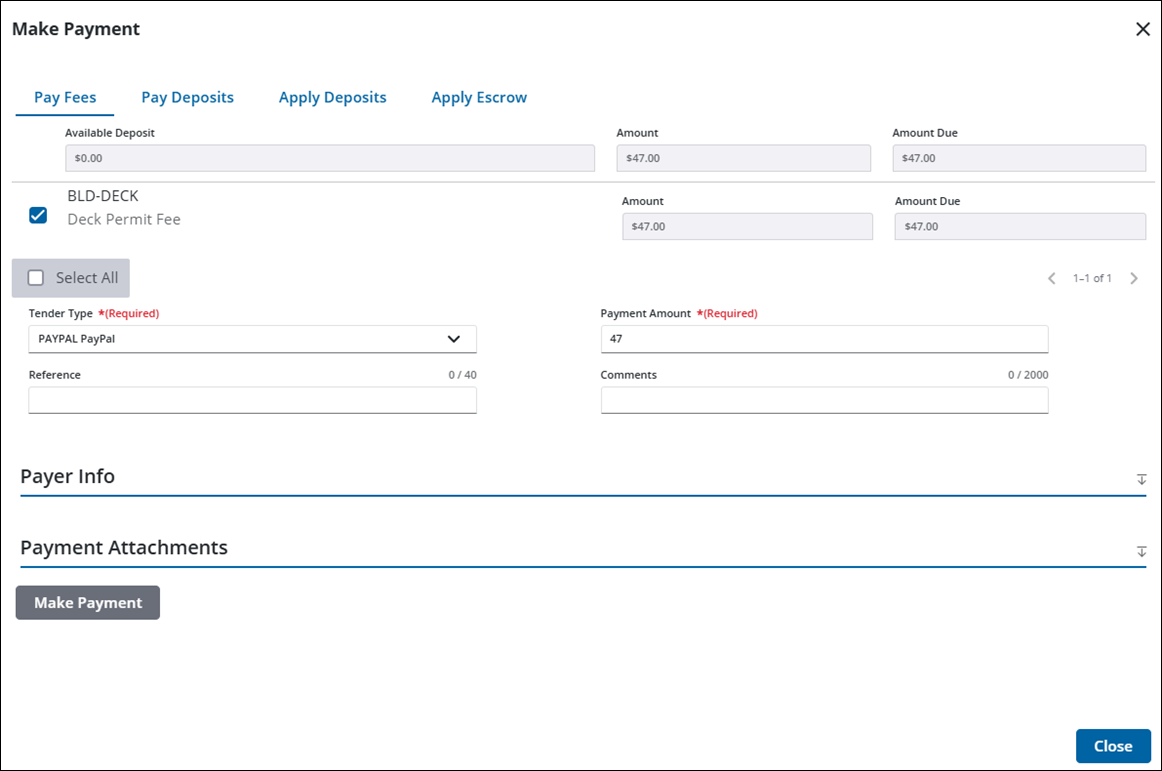
- Select Pay Fees or Pay Deposits to choose whether you want to pay fees or pay deposits associated to the case.
- Select the fee(s) or deposit(s) you want to pay.
TIP: Select the Select All check box to apply the payment to all of the fees or deposits. Select the Clear All check box to unselect all of the fees or deposits.
- Select the Tender Type.
- The Payment Amount defaults to the total amount of the selected fee(s) or deposit(s), but the amount can be changed.
- Enter a payment source, such as an internal purchase order (PO), in the Reference field.
- Enter any additional Comment about the payment.
- Select the Payer Info down arrow to add information about who made the payment. See Add Payer Information to a Payment for more information.
- Use the Copy From Person drop-down list to add contact information from people already associated to the case, or enter the information manually.
- If you have attachments, select the Payment Attachments down arrow. See Use Attachments on Payments for more information.
- Click Make Payment.
NOTE: If no fees or deposits are selected, the payment is applied to every fee or deposit and moves down the list of fees or deposits until the total amount paid is applied.
Once the payment is made, a receipt is created and can be viewed. See View Receipts for more information.
See Payment Fields for an explanation of the fields.
You can make a payment towards fees using a deposit that has been paid.
|
|
- Open a case and navigate to the Payment panel.
- Click Add record to open the Make Payment panel.
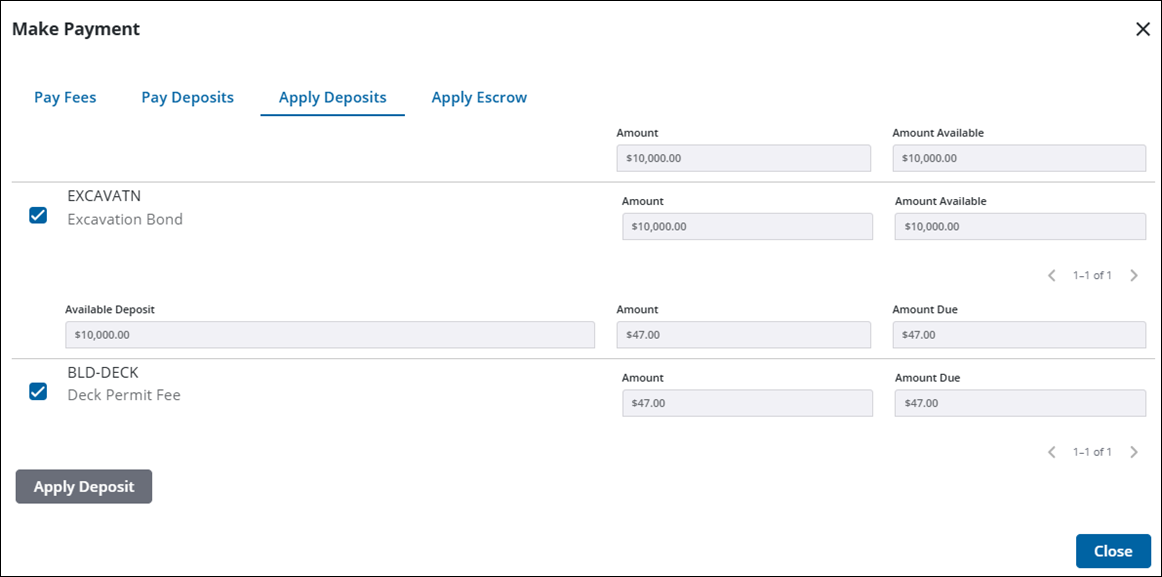
- Click Apply Deposits.
Any paid deposits and unpaid fees associated to the case are listed.
- Select the deposit(s) that you want to apply to the associated fee(s).
- Select the fee(s) you want to pay with the selected deposit(s).
- Click Apply Deposit.
NOTE: If no fees are selected, the deposit is applied to every fee and moves down the list of fees until the total amount of the deposit is applied.
Once the payment is made, a receipt is created and can be viewed. See View Receipts for more information. The Make Payment panel refreshes and shows any remaining fee(s) or deposit(s) that were not selected or that were not paid by the applied deposit(s).
See Payment Fields for an explanation of the fields.
You can make a payment towards certain fees using a business or contractor's escrow account.
|
|
TIP: See Apply Escrow Payments to Fees on Trimble Unity for a quick start guide on this subject.
- Open a case and navigate to the Payment panel.
- Click Add record to open the Make Payment panel.
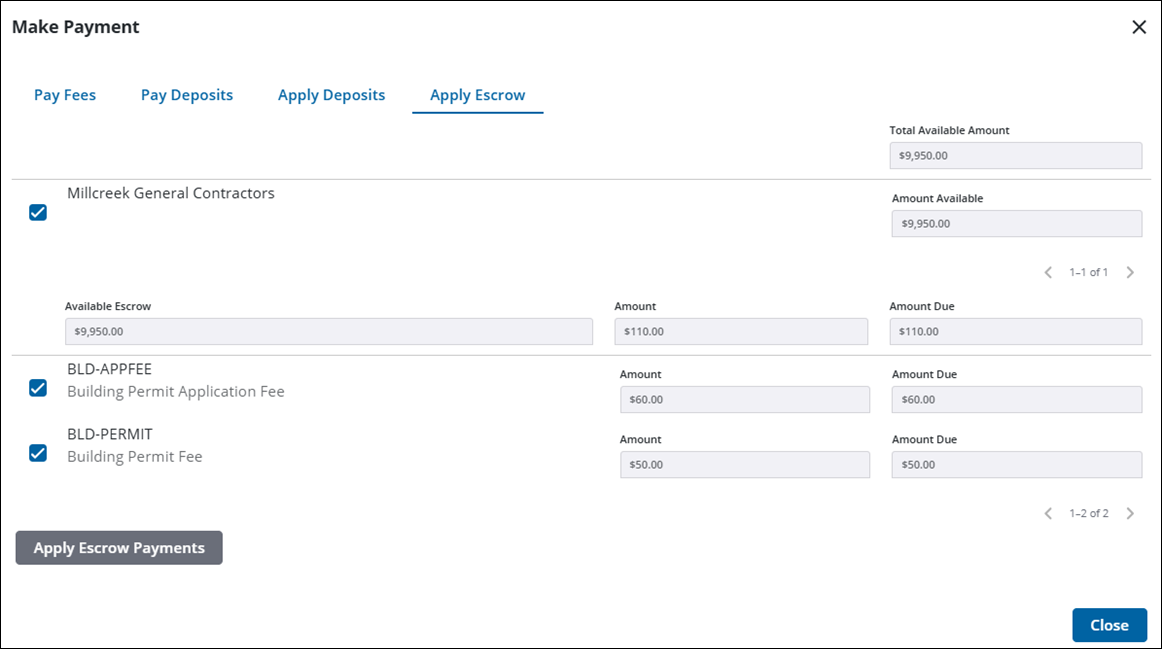
- Click Apply Escrow.
Available escrow amounts for the selected business or contractors, as well as applicable escrow fees, are listed.
- Select the business or contractor to apply their escrow amount to the selected fee(s).
- Select the fee(s) you want to pay with the selected escrow account.
- Click Apply Escrow Payments to apply payment to the fee from the business or contractor's escrow account.
The Make Payment panel refreshes and shows any remaining escrow amounts and fee(s) that were not paid. A receipt is created and can be viewed. See View Receipts for more information.

