Begin a New Application
Each application consists of several panels, but the exact panels and the order in which they appear may vary depending on the kind of permit or license you are applying for. Each of the possible panels is discussed here.
|
|
 PREREQUISITES:
|
|
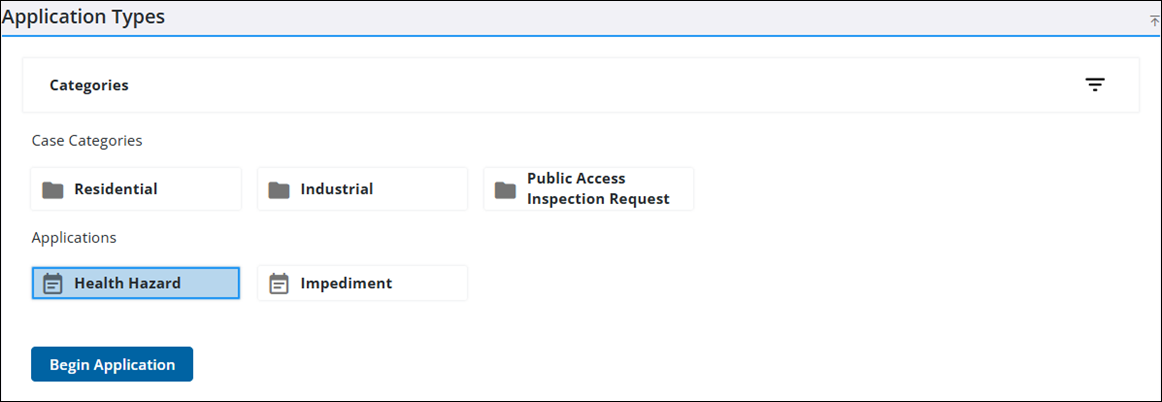
- Click New Application on the home screen to open the Application Types page.
- Select the kind of permit or license you want to apply for and click Begin Application. You can use the filter option to search the list of application types.
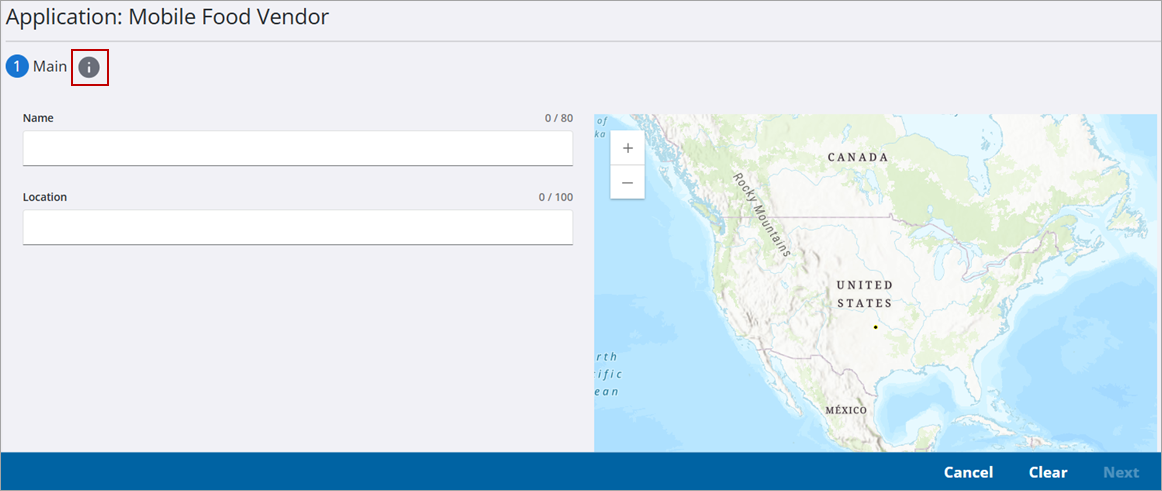
When you select an application, you may see a text box with information relating to the application type.
The Create Application page opens. If the administrator has configured it, a Show help icon appears next to each panel name. See Guided Access in the Admin Guide for Trimble Unity Maintain and Trimble Unity Permit for more information. Administrators can customize the size of the panels and set the default font size for guided access in Admin. See Configure Public Access Preferences in the Admin Guide for Trimble Unity Maintain and Trimble Unity Permit for more information.
 TIP: If the selected case template is configured to automatically create child cases, those are created at the same time as the primary case.
The Main panel contains the name and location of the application.
- Enter a Name for the application.
- Enter an address in the Location field to open a list of possible matches. Once the address is selected, the map centers on the address. If the case template defined a Public Site Entity, the system adds the matching asset type to the case. Otherwise, the case includes only the address. If configured by the administrator, when an asset is added as an address, any people associated to that asset are automatically added to the People panel. See Configure GIS Data Fields in the Admin Guide for Trimble Unity Maintain and Trimble Unity Permit for more information.
- Click Next.
Once your application is complete, you can open it at any time by clicking the application icon on the map.
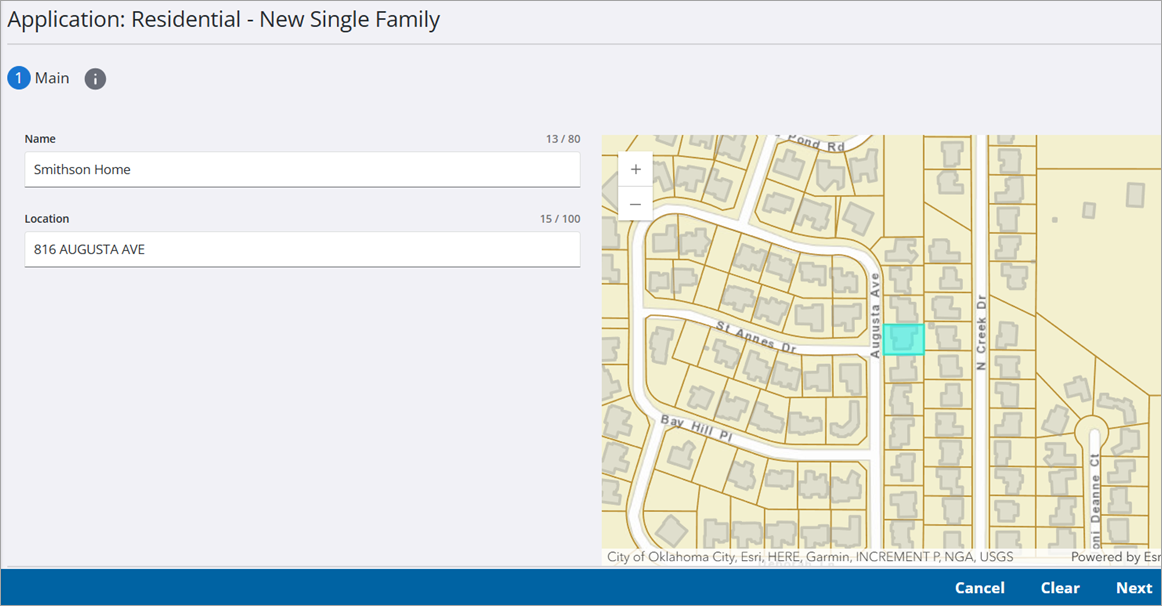
You may also select a location by clicking the map. Doing so marks the location with a map pin and displays the address associated with that location. If the administrator has configured the application template to select a specific item on the map, the item is highlighted and data corresponding to that item appears.
 NOTE: When RequireLocation is false and UseLocation is true in the WebAppSettings.config file, the geocode service still tries to geocode the address entered by the user. If the address isn't found by the geocode service, the user can select a different address that was found by the geocode service or keep the address they entered and continue with the case.
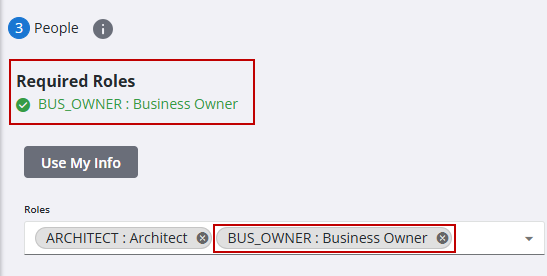
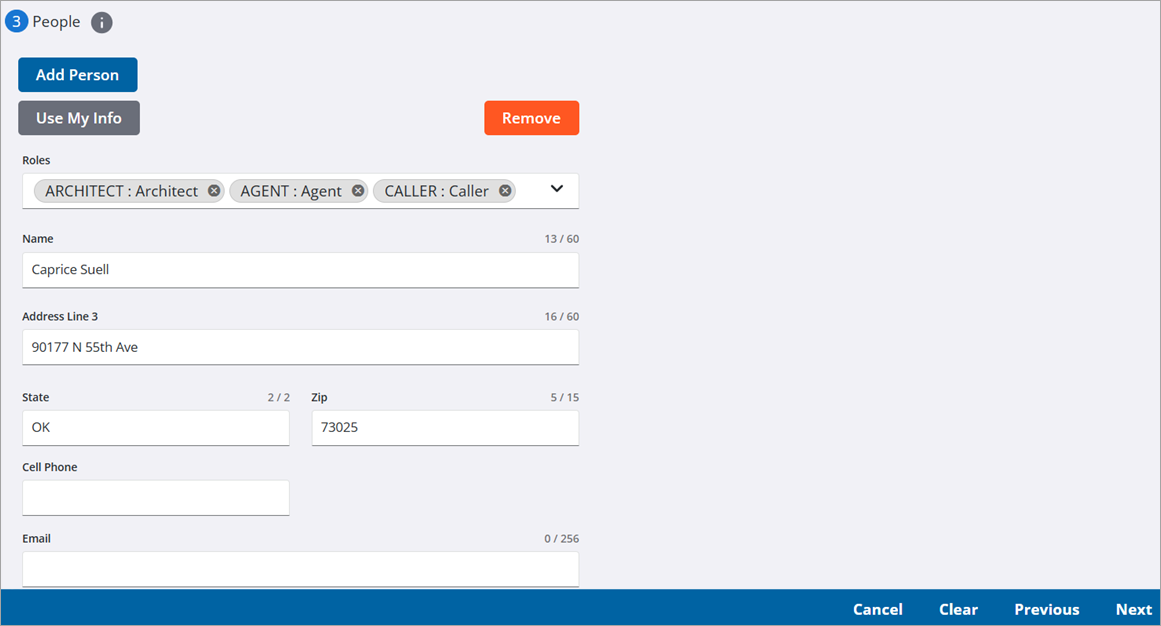
The People panel is used to enter the name and contact information of people involved with the permit or license. This panel varies depending on the type of case. Items in red are required fields. If configured by the administrator, when an asset is added as an address, any people associated to that asset are automatically added to the People panel. See Configure GIS Data Fields in the Admin Guide for Trimble Unity Maintain and Trimble Unity Permit for more information.
NOTE: Administrators can define the order and visibility of the fields in the People section. If nothing is defined for the selected role, the default fields appear. One person may have multiple roles, see Add a People Role in the Admin Guide for Trimble Unity Maintain and Trimble Unity Permit for more information.
If the administrator configured a case template to require one or more roles, a Required Roles notice displays at the top of the People section. A required role must always be assigned to at least one person. If the required role is not assigned or is removed, the case cannot move forward.
- Typing three or more characters in the Name field returns a drop-down list of potential matches. Selecting from the results automatically populates their contact information.
- Click Use My Info to automatically enter the information from your user account into the corresponding fields.
When adding people to people roles, the email address is verified to ensure it's a valid email address. The phone number is also verified to ensure it matches the format specified in Admin under Preferences Region Settings. See Configure Region Settings Preferences in the Admin Guide for Trimble Unity Maintain and Trimble Unity Permit for more information.
If the Add Person and/or Remove buttons appear at the top of the People section, you have permission to add and/or remove people during creation, after creation, or both, depending on how the administrator configured your user role.
- Click Add Person to add an additional person to the application.
- Use the Roles drop-down list to assign a role to the user, one user may be listed with multiple roles.
- Click Next.
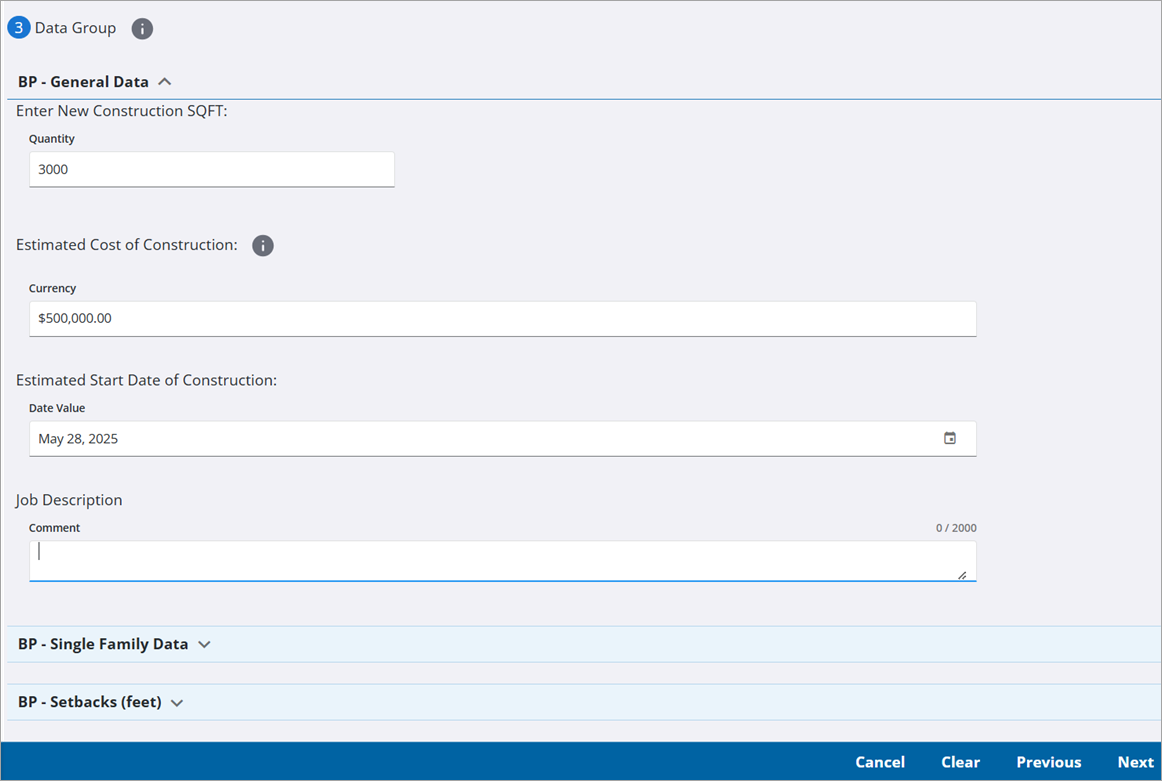
The Data Group panel requests specific information about your project. The fields vary depending on the kind of case you are creating. The information collected here may be used to calculate fees. Required fields are marked in red. When adding Data Groups, some fields, such as the zip code, can automatically populate based on the selected asset on the map. If the user changes the asset on the case before submission, the case data will update to reflect the new asset.
- Enter your application information.
- Click Next.
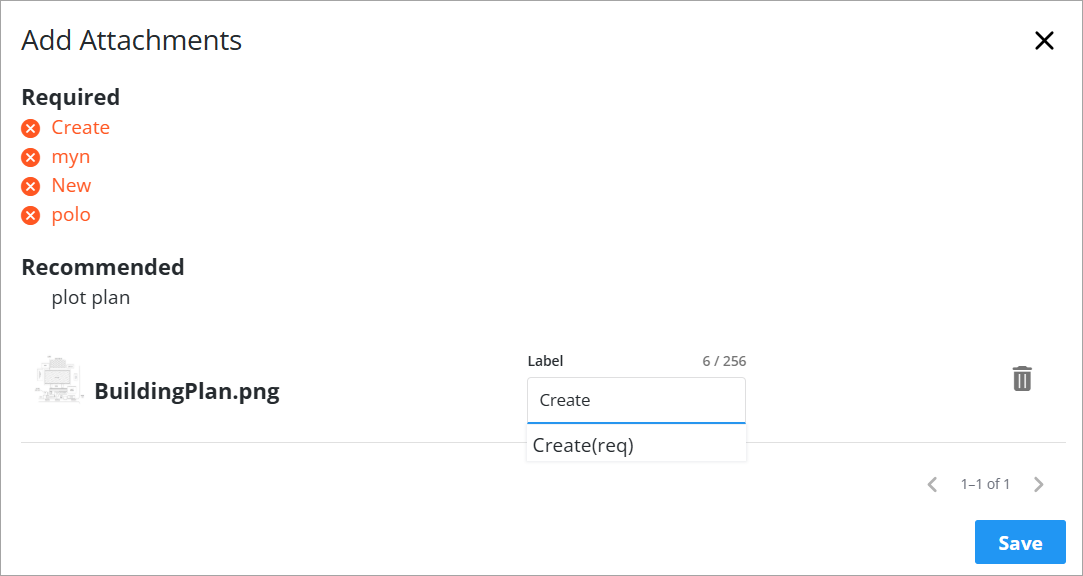
The Rel Docs panel allows you to attach any relevant files to your application.
|
|
NOTE: The administrator can specify which kinds of files you can attach, so you may not be able to upload some file types. See Configure Site Options for more information. The administrator can determine if users can add, edit, or remove attachments based on a certain case status. See Configure Required Items on a Case Template in the Admin Guide for Trimble Unity Maintain and Trimble Unity Permit for more information. The administrator can also determine if attachments can be added or removed during or after case creation. See Add a Security Role in the Admin Guide for Trimble Unity Maintain and Trimble Unity Permit for more information.
- Review the Required and Recommended line items to see a list of the documents that are needed.
- Click Add and browse to the attachment to add a new attachment, or drag and drop the attachment to the box that says Drop Here.
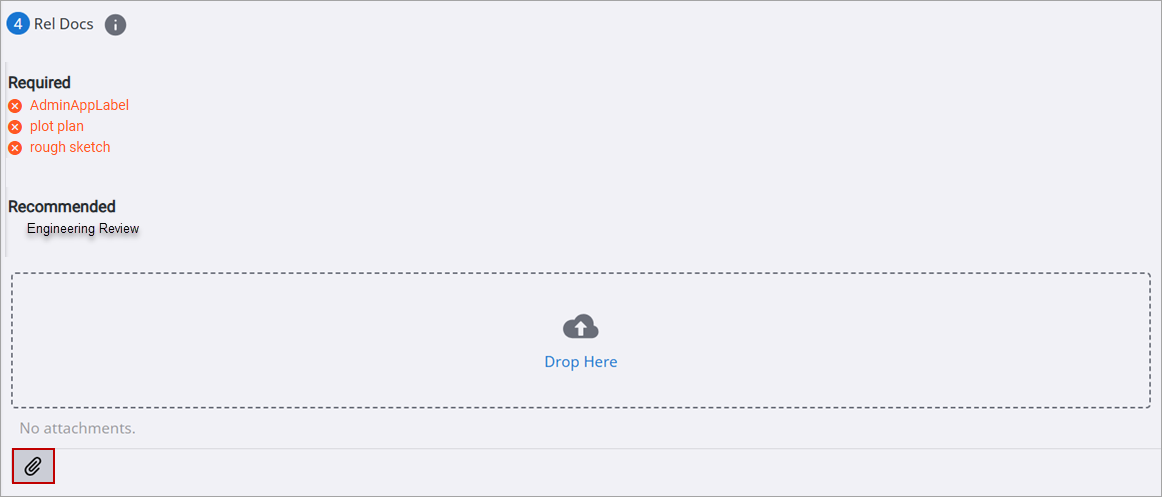
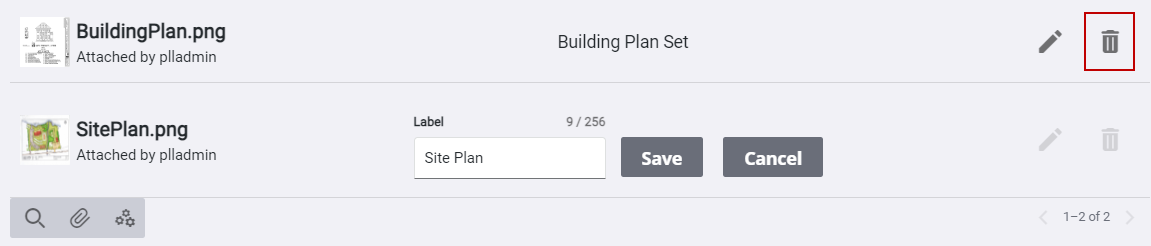
- Once an attachment is added, use the Label drop-down list to select a label for the document and click Save.
- To remove an attachment, click Remove attachment next to the attachment. Once the case is created, attachments can only be removed by the user who added them.
If the administrator has enabled it, you can also draw or add notes to the map and save it as an attachment. To enable map drawings, see Configure Site Options for more information.
- Use the Draw map tool to draw objects or add notes to the map.
NOTE: The Draw map tool is very similar to the Redline map tool in Respond except that it uses a Save button rather than an Export option. The functionality is otherwise identical. See Redline in the Respond Guide for Trimble Unity Maintain and Trimble Unity Permit for more information.
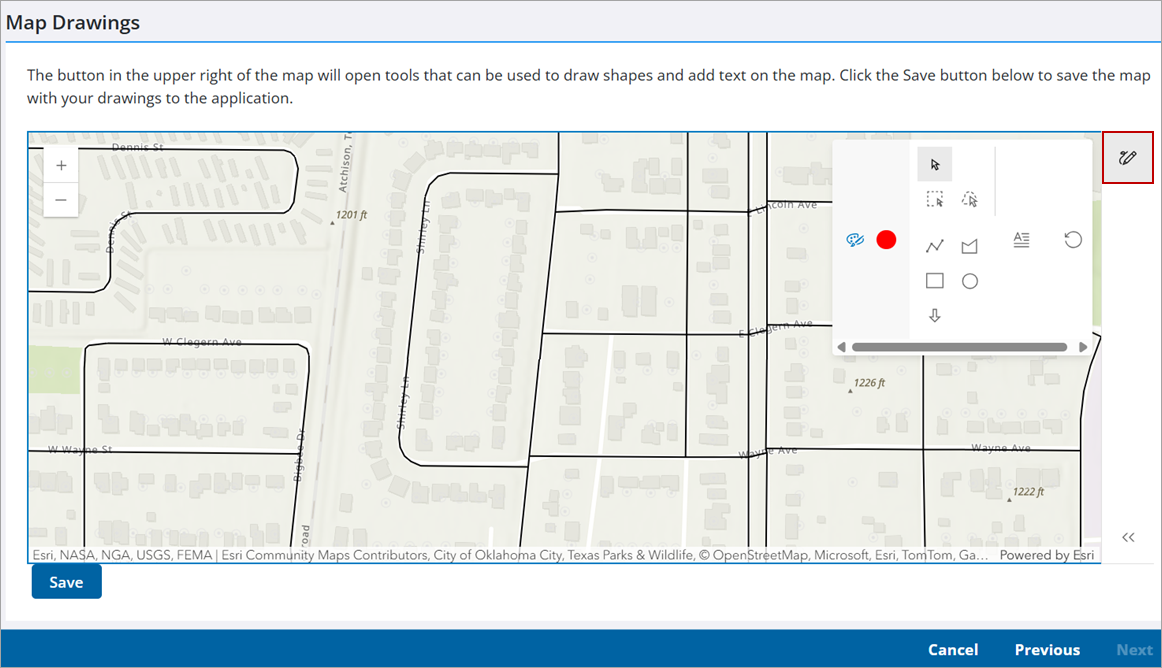
- Click Save to attach the map image to your case.
- Click Next.
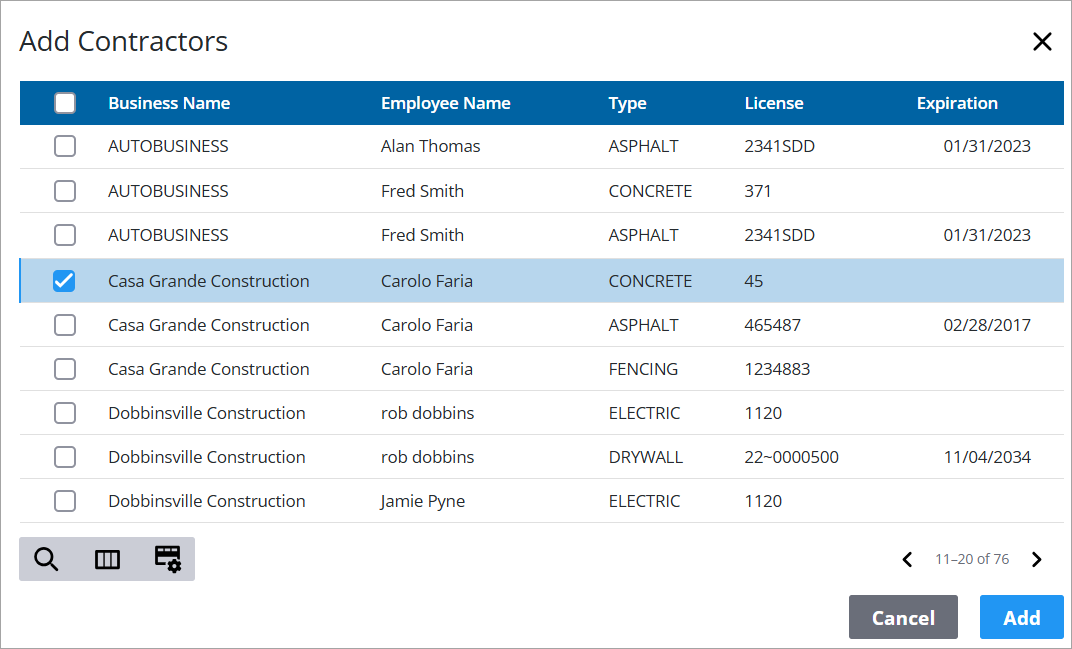
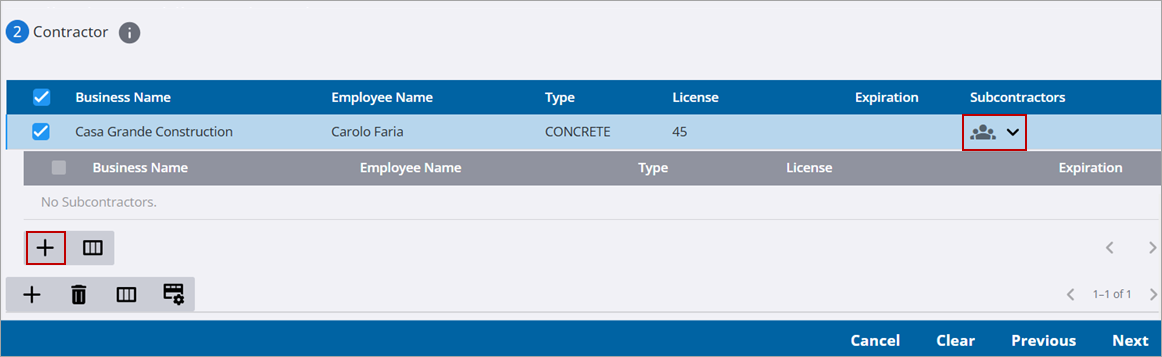
The Contractor panel allows you to select contractors and subcontractors for your application. By default, only contractors with current licenses appear in this list. Contractors with expired licenses are not listed unless an administrator enables the Allow Expired Contractors setting in Admin. See Configure Public Access Preferences in the Admin Guide for Trimble Unity Maintain and Trimble Unity Permit for more information.
- Click Add record to open a list of contractors. The list shows contractors with local or state licenses. If a contractor has both a local and state license, it is shown in the list twice.

- Select a contractor from the Add Contractors panel.
- Click Add to add the contractor.
TIP: You can filter the list of records displayed. See Filter Records for more information.
- Click the Subcontractors drop-down list as needed.
- Select the subcontractor from the Add Subcontractors panel.
- Click Add record to add the subcontractor.
- Click Next.
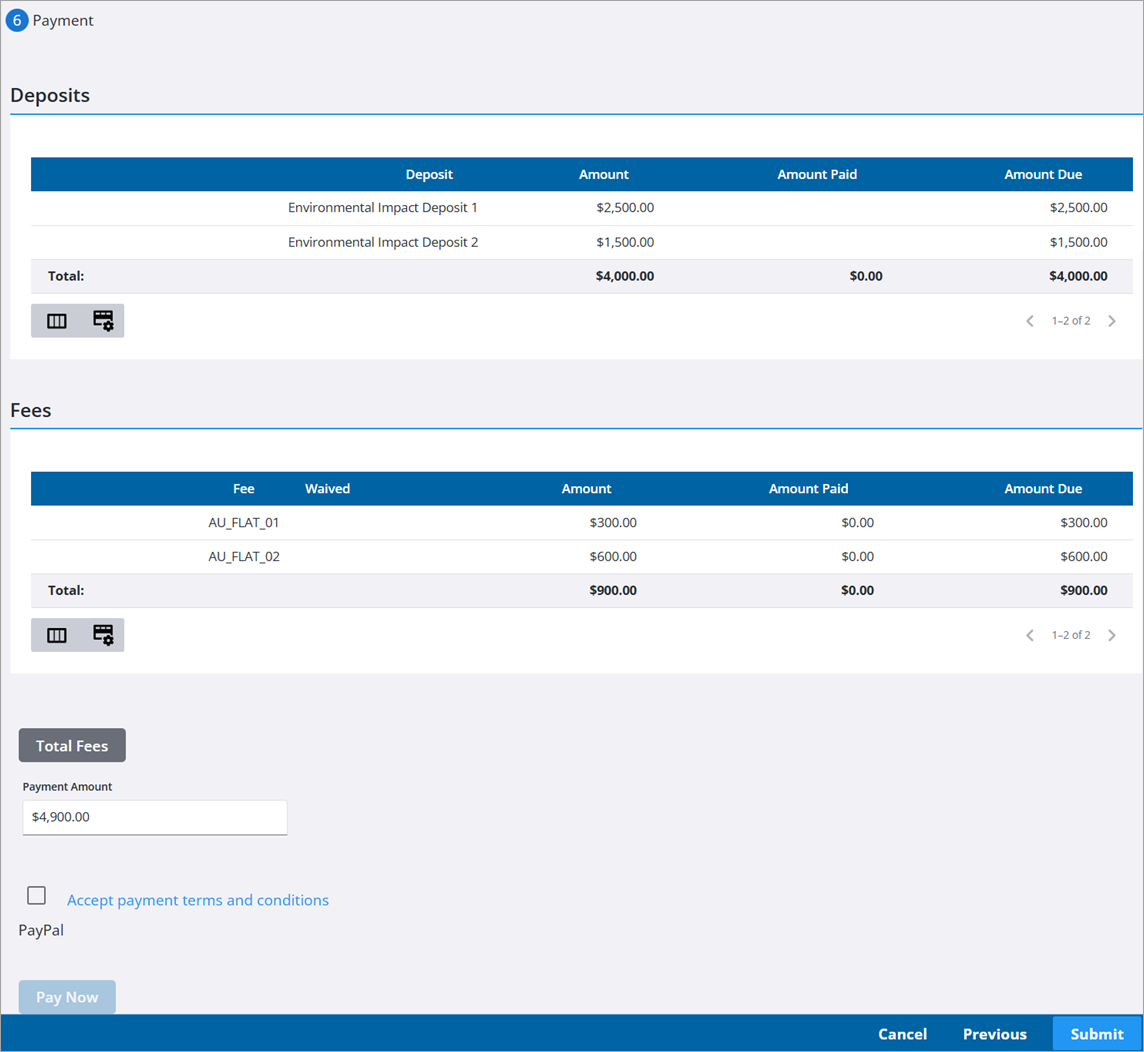
The Payment panel displays all the deposits and fees attached to your application. Administrators can configure a case template to require fees be paid in full when a case is submitted. See Configure Public Access Options on a Case Template in the Admin Guide for Trimble Unity Maintain and Trimble Unity Permit for more information. On cases of this type, the Pay Now button is the only option that displays and no partial payments are allowed. The case is submitted after the payment successfully posts.
|
|
|
|
- To make a payment now, click the Accept payment terms and conditions link and make sure you understand them, then select the check box next to the link to enable the Pay Now button.
- Click Pay Now to go to the payment portal used by your organization.
 IMPORTANT: The Pay Now button is grayed out if the payment amount is zero or less OR if the payment amount exceeds the total amount due.
- You may also submit your application without making a payment by simply clicking Submit. This submits the application and takes you to the summary page for your case.
NOTE: You may need to accept terms and conditions before you can submit certain kinds of applications.
When a case is submitted, the Accepted By and Date Accepted fields are set to the current user and time. Previously, these fields were set according to the original user and time when the application was initiated.
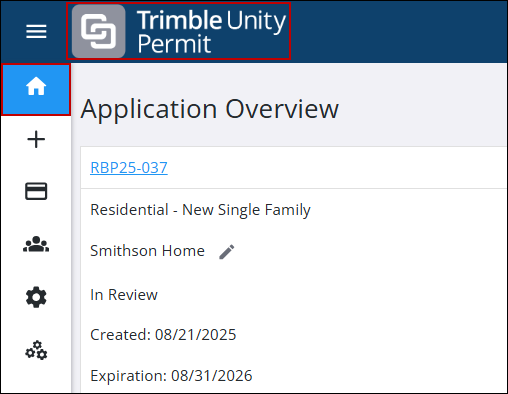
Once you have completed the application and, if necessary, paid the related fees, you will be redirected to the Application Overview page for the application. This page contains all the information added on the previous pages, as well as any other panels configured for the case template. See Case Templates for more information.
From the Application Overview panel, users can navigate to the home page by clicking the Trimble Unity Permit logo or Home Page in the menu. To access the case from the home page, see Review Submitted Applications for more information.